Excel Add-ins
Datatailr provides a unique approach to Excel Add-ins, which allows using Excel as an interface to the cloud backend with your own custom functions, existing or new ones, with support for streaming data and array operations.
In Datatailr use case, Excel serves as a frontend and does not perform any calculations on the client side – functions are executed on the backend and their output is returned to Excel. Excel Add-ins in Datatailr run configurable backend containers on a per-user basis. This also means that add-in developers have full control over which version of the code is being used – if the add-in is restarted with an updated image, its users will also be operating on the latest version of the code.
Excel Launcher Setup
To start using Datatailr Excel Add-ins, it is first required to install Excel Launcher on your computer. The launcher works in the background to add support for the Datatailr Excel Addins.
-
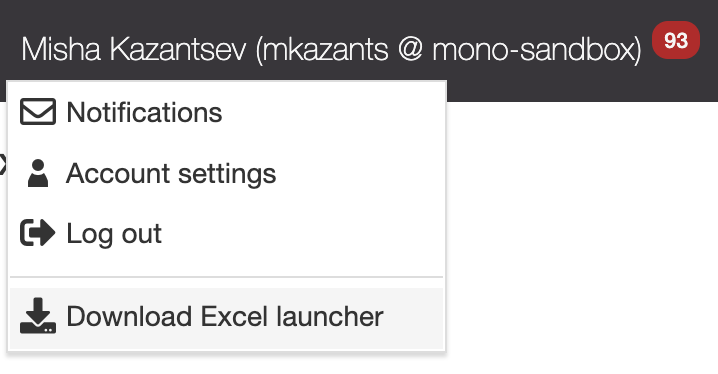
Click on your name in the top right corner of the Datatailr window to display a dropdown menu and select Download Excel Launcher, as follows –

-
Depending on your OS, an
.msior.dmginstaller will get downloaded. Launch the installer and follow the instructions to setup the launcher. No organizational admin rights are required, not even for installing this in an enterprise. -
Typically, nothing special is displayed. You can now launch your add-in from the main page to verify that it works as expected.
Creating Excel Add-ins
Steps that are required to create and deploy an Excel Add-in are similar to those of the App deployment process – we need to create a .py file with its logic (Step 1), package it (Step 2), build an image with the package (Step 3) and use it to deploy the runnable (Step 4). Don't worry – it is easier than it sounds.
-
Writing Code
Below you can find the example of a simple Excel Add-in which demonstrates how to define your add-in and how to add functions to it. Please note that due to the limitations imposed by Excel, types must be annotated –
import dt.excel

# define your addin - specify a namespace and a description
addin = dt.excel.Addin('MyAddin', 'This is my first Excel addin!')

# use the decorator to expose functions which you want to be available in Excel
# do not forget to annotate types!
@addin.expose(description='Adds 2 numbers', help='Pass 2 numbers to the function')
def add(a: int, b: int) -> float:
    return a + b

# an array operation example
@addin.expose(description='Adds 2 arrays', help='Give 2 arrays for component wise add')
def add_two_arrays(a: list, b: list) -> list:
    if len(a) != len(b):
        raise ValueError('Not equal length')
    result = []
    for count in range(len(a)):
        result.append([])
        for count2 in range(len(a[count])):
            result[count].append(a[count][count2] + b[count][count2])
    return result

# a ticking data example - note streaming=True in the decorator and queue as the first input argument
@addin.expose(description='Ticks a new value every second', help='Give a seed value to the function', streaming=True)
def tick(queue: dt.excel.Queue, a: int) -> float:
    while True:
        a += 1
        queue.result(a)
        time.sleep(1)

# the entrypoint definition
def __excel_main__(port, debug=False):
    addin.run(port=port)

# this block makes the add-in runnable in your IDE for debugging purposes
if __name__ == '__main__':
    __excel_main__(int(sys.argv[1]))
Note – any function with
streaming=Truemust have at least one input argument, apart fromqueue: dt.excel.Queue.Feel free to test the add-in in your IDE before proceeding to the deployment. To do so, run the above file from the terminal while passing an arbitrary port:
python addin.py 12345. Alternatively, specify the port explicitly within theif __name__ == '__main__':block and click the "Run Python File" button in the top-right corner of your IDE.
 -
Packaging Code
Once you are happy with results, build a package with your add-in as described in Step 2 of the app deployment process.
-
Building an Image
Include the package into a container image as described in Step 3 of the app deployment process.
-
Deploying the Add-in
Once the image is built, follow Step 4 of the app deployment process to deploy the add-in. The only difference with that tutorial would be using the Excel Addins tab of the Job Scheduler instead of the Apps tab.
Using Excel Add-ins
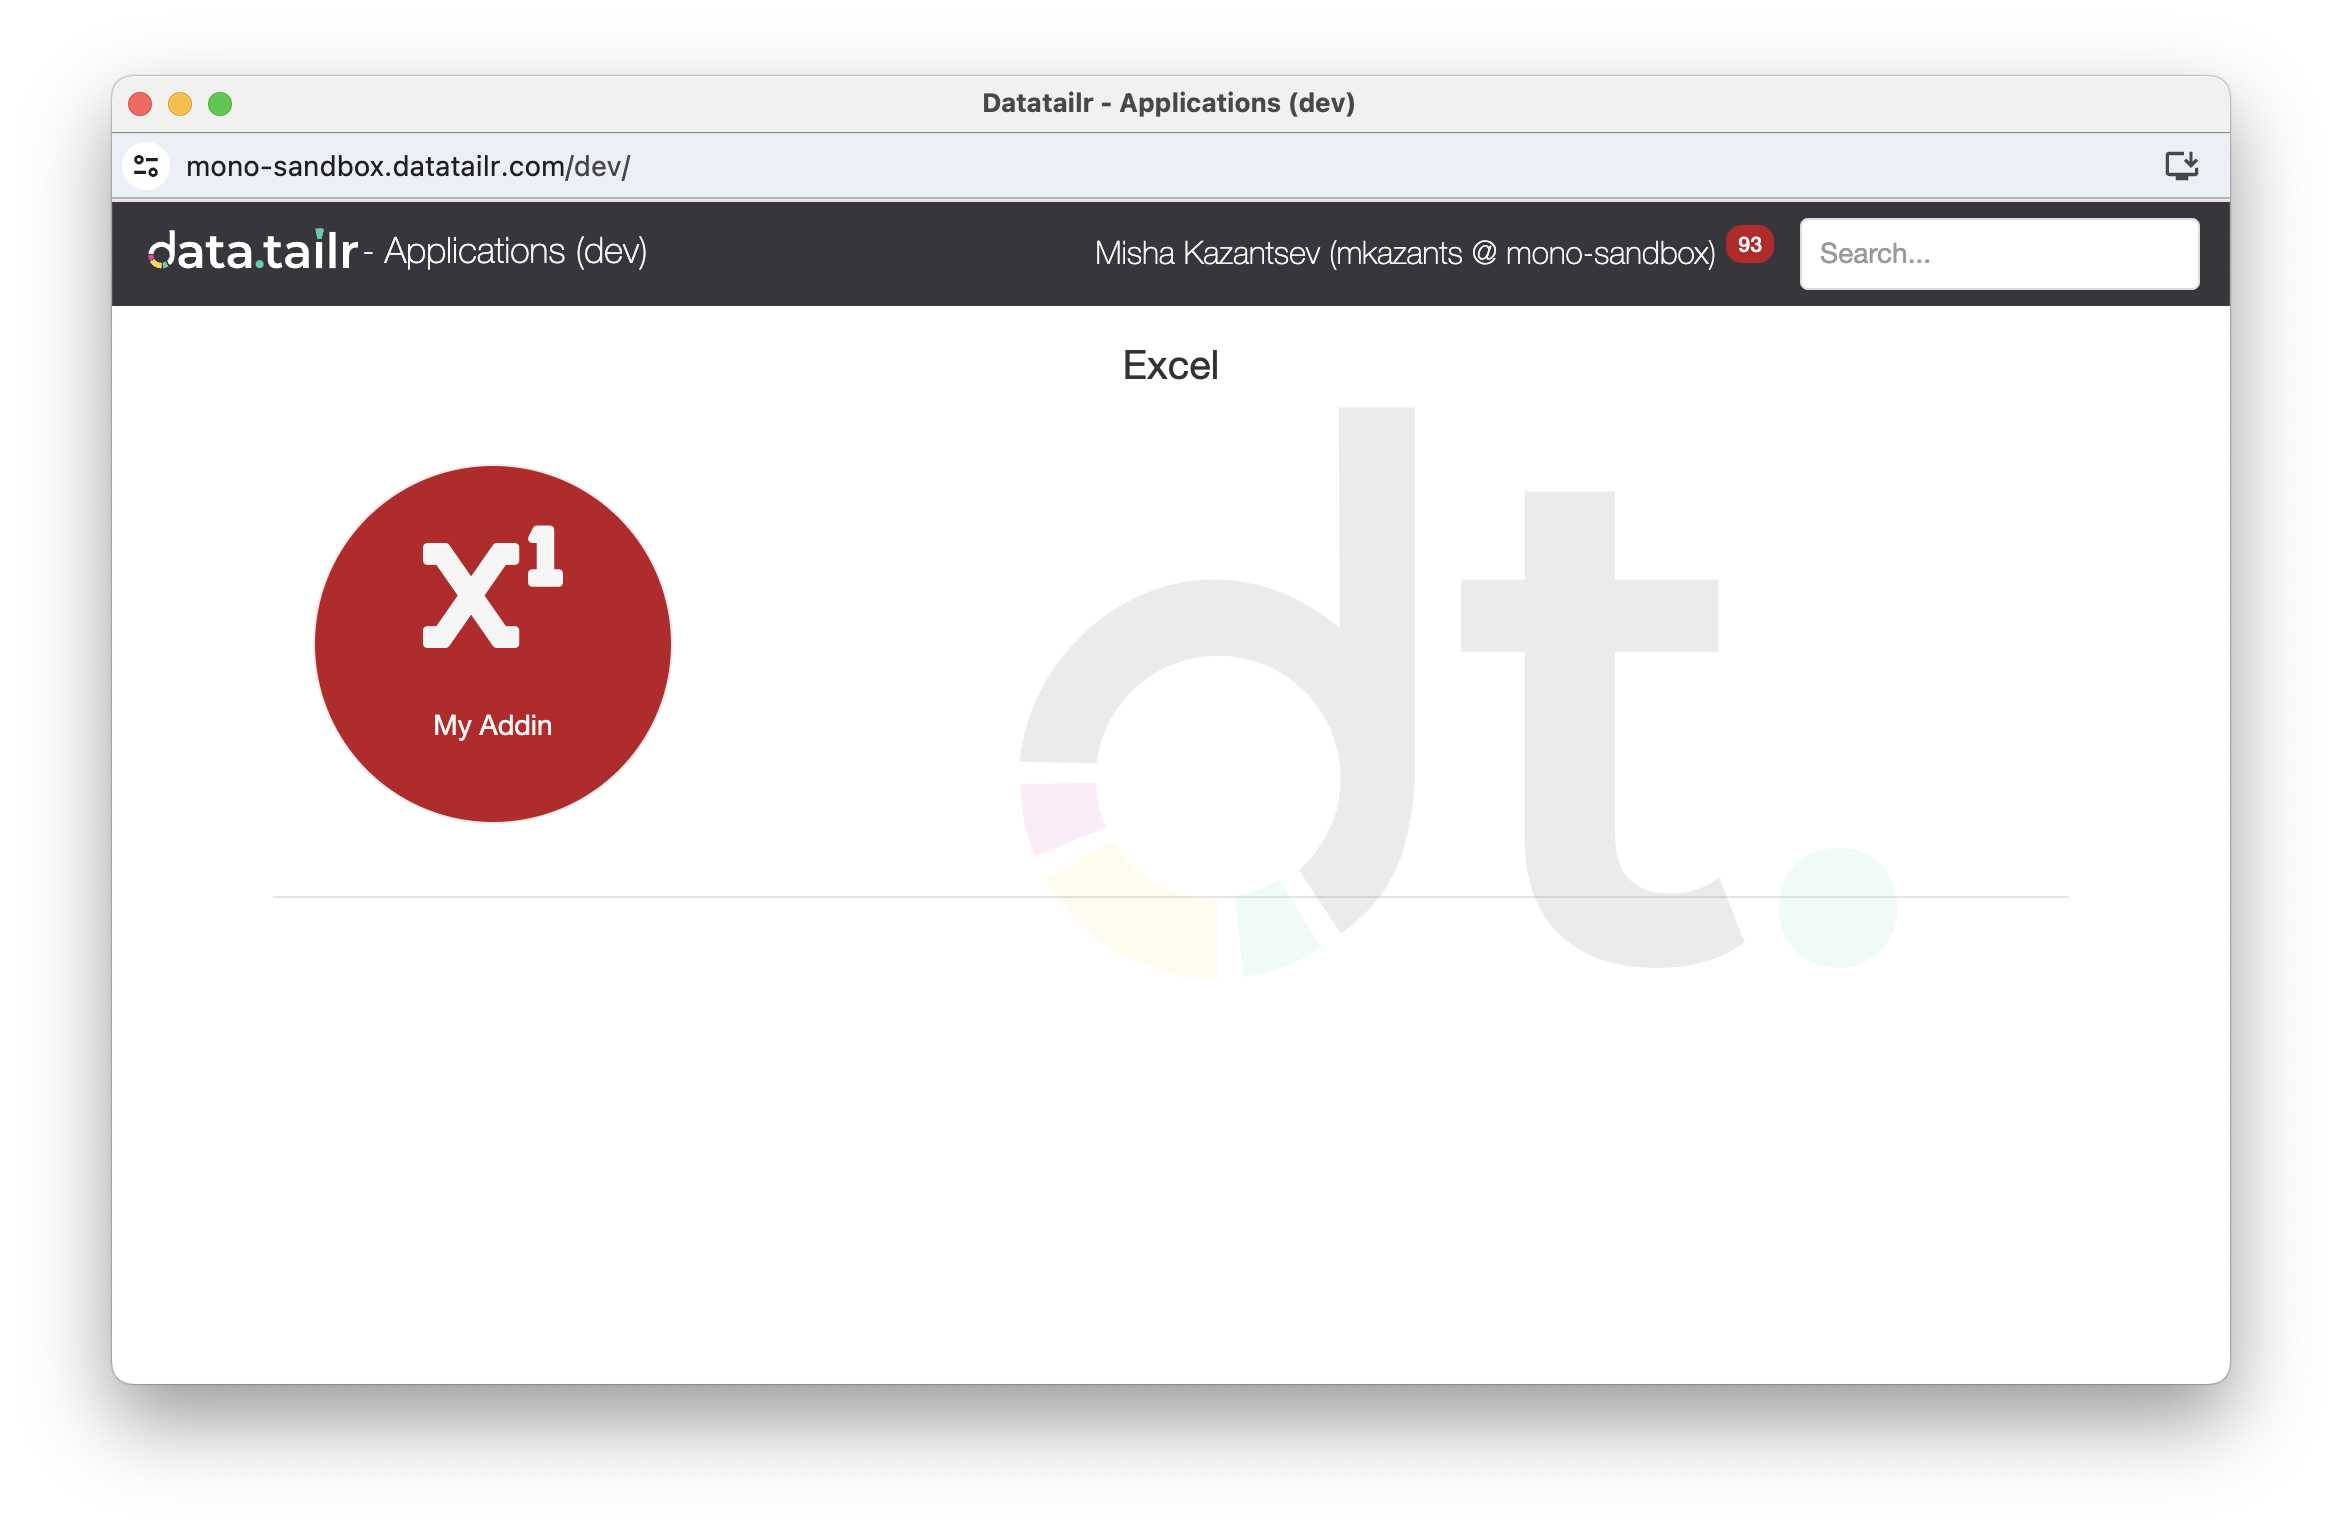
After the Add-in is deployed, you can find its icon in Dev/Pre Apps or on the main page, depending on the Datatailr Environment you configured it to run in. Here's an example of the Add-in deployed in Dev –
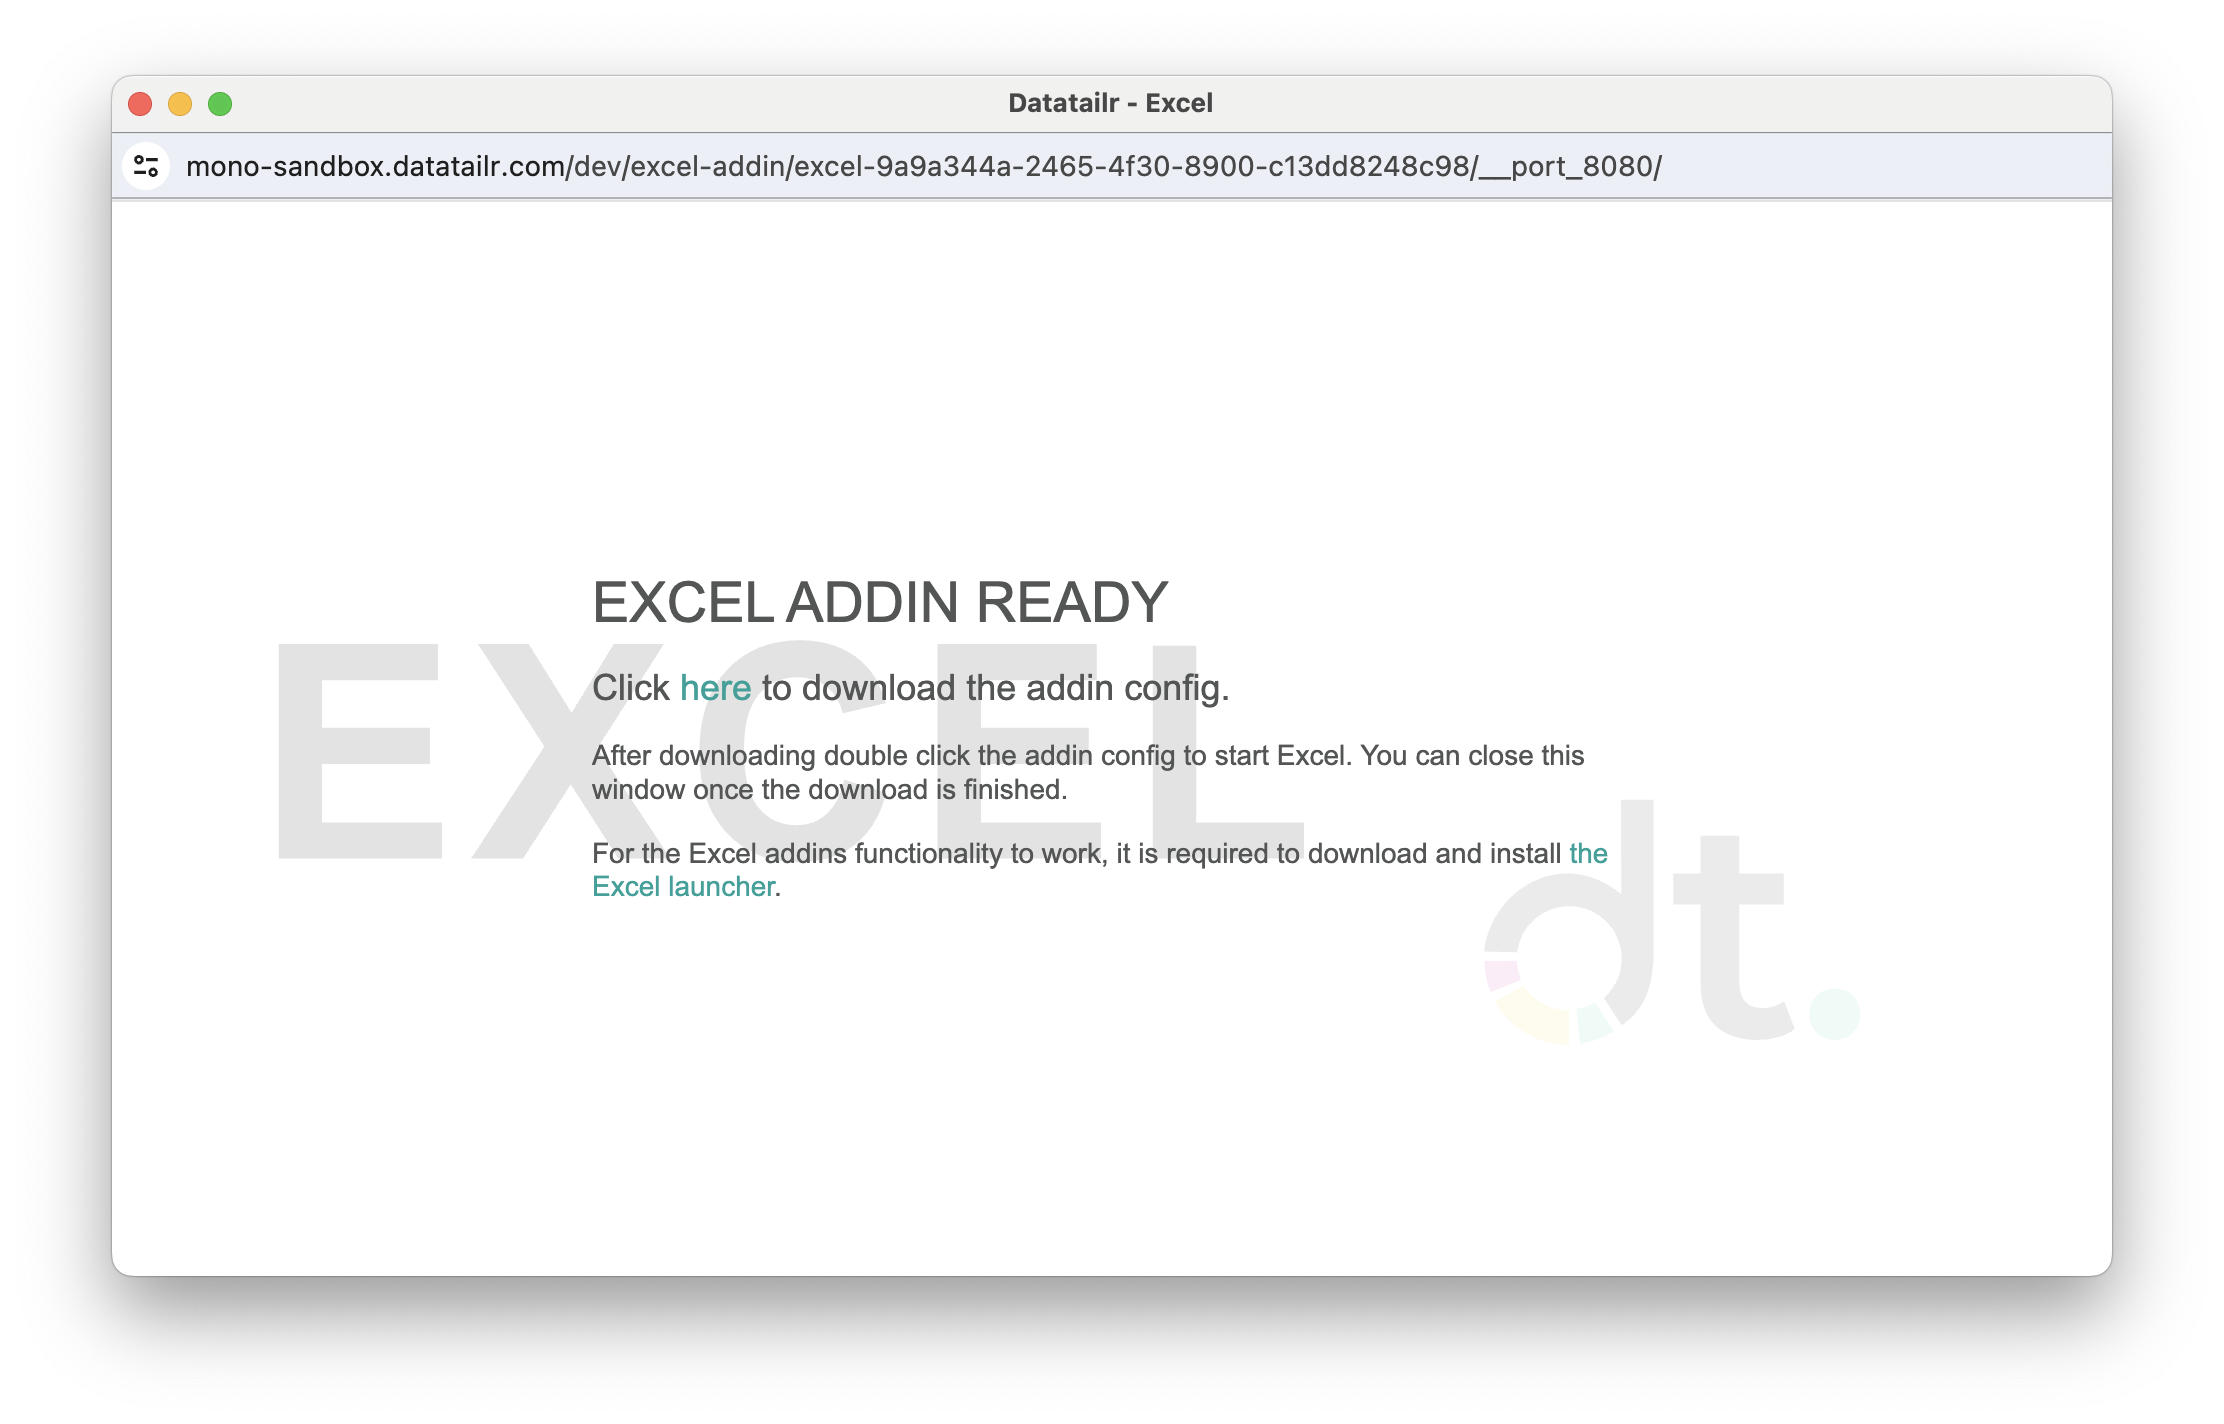
 Upon clicking the icon the loading page will be displayed, followed by this pop-up –

Click on here to download the add-in .dea configuration file. Once the file is downloaded, double-click on it to launch Excel and start using the add-in.
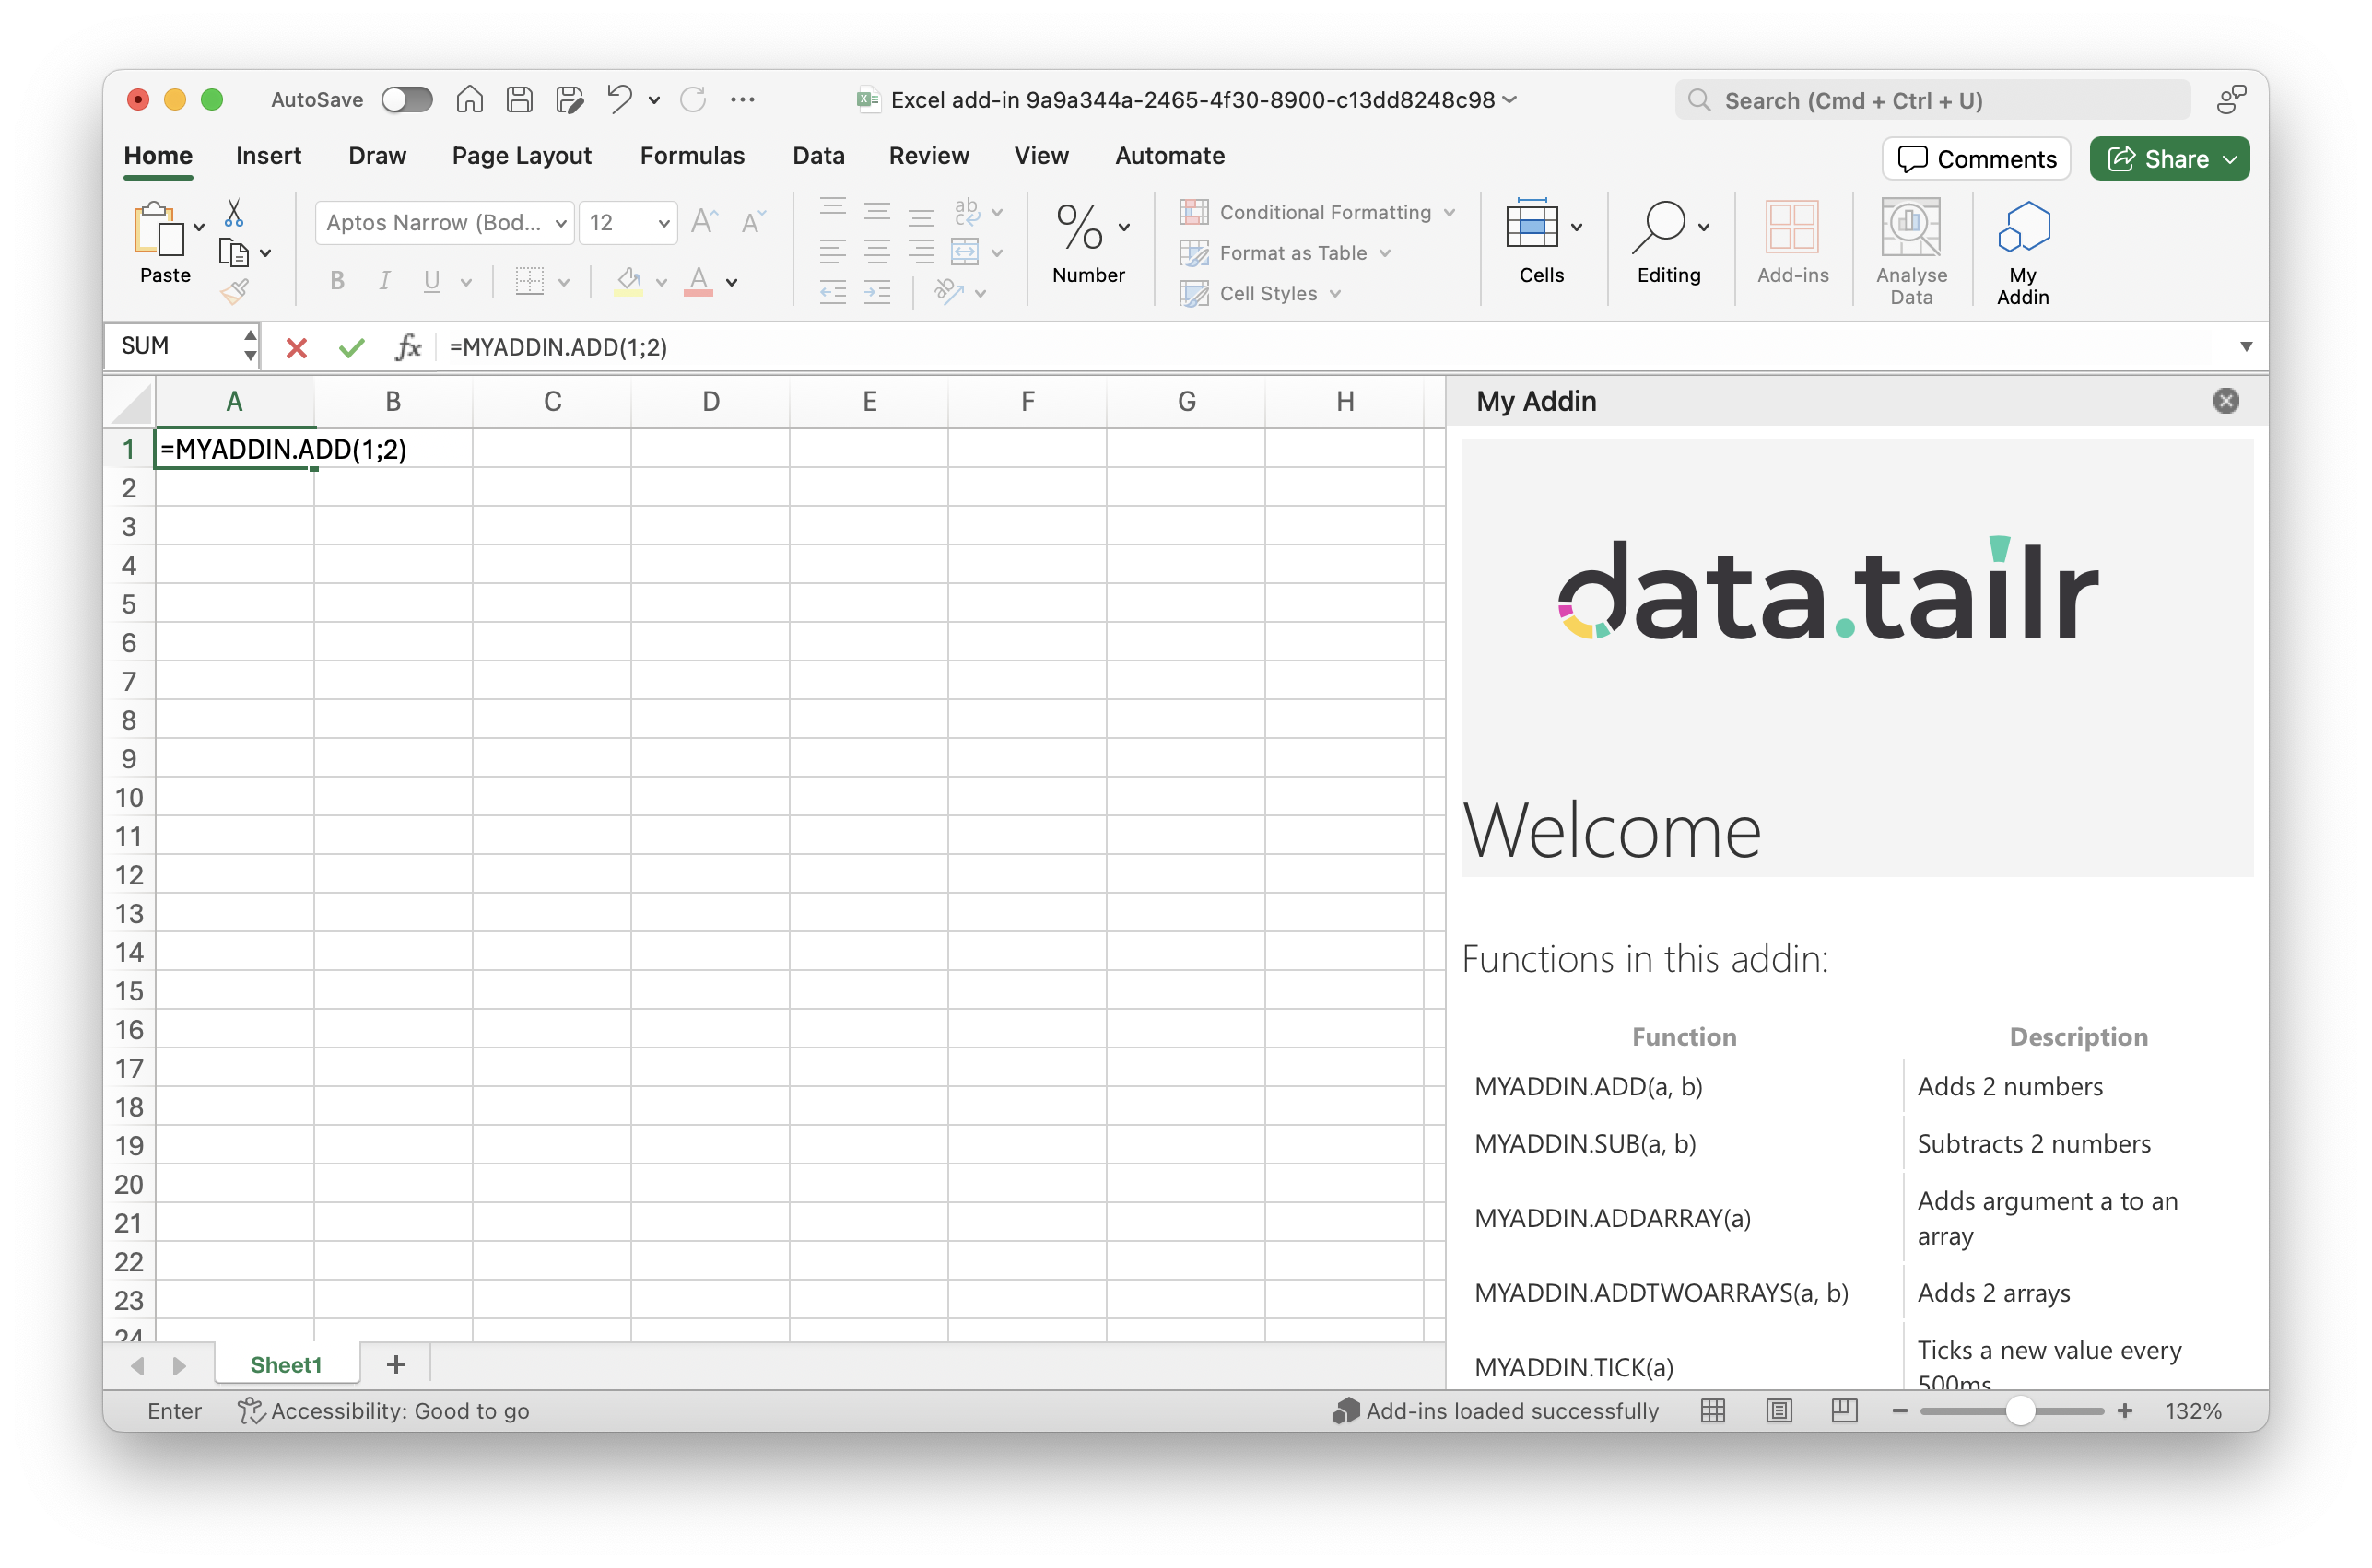
Excel will launch with the Add-in prepared and its command palette listing all available functions on the right side. To start using the functions, type =AddinName.FunctionName(arguments) in any cell and hit Return –

You will see #BUSY in the cell output while the request is being sent to the backend. After several moments, the cell will change its value to the output of the function.
Note – when the add-in is invoked for the first time, the operation might take a bit longer than usual because user authentication has to be performed.
If you see #VALUE in the cell output, it means that an error happened on the backend side – this is often caused by incorrect type or format of the input arguments. Revisit Creating Excel Add-ins section, try debugging the Add-in in your IDE to see what is going wrong, or consult Datatailr support for help.
To learn more about Excel Add-ins deployment, see:
Clearing the Add-ins Cache
Sometimes you may run into situation where an add-in cannot be loaded and a yellow error pop-up appears in Excel. In such cases Microsoft recommends clearing user cache for Office add-ins –
On Mac:
/Users/<username>/Library/Containers/com.microsoft.Excel/Data/Library/Application\ Support/Microsoft/Office/16.0/Wef/*/Users/<username>/Library/Containers/com.microsoft.Excel/Data/Library/Caches/*/Users/<username>/Library/Containers/com.microsoft.Excel/Data/Documents/wef/*
On Windows:
C:\Users\<username>\AppData\Local\Microsoft\Office\16.0\WefC:\Users\<username>\AppData\Local\Microsoft\Office\16.0\WebServiceCache\AllUsers\odc.officeapps.live.comC:\Users\<username>\AppData\Local\Microsoft\Office\16.0\WebServiceCache\AllUsers\officeclient.microsoft.com
Updated 3 months ago
