Hello World App from Scratch
The following example will walk you through the main stages of developing and deploying Apps in Datatailr, inlcuding Package and Image building.
You can find demo examples of various Datatailr runnables in the datatailr-demos repository. Feel free to fork or copy-paste it and use included demos to get started with your own projects.
In this tutorial we will focus on the App deployment, but the flow is very similar for other types of Runnables – Batch Jobs, Services, Jupyter Notebooks and Excel Add-ins.
There are four main steps in deploying any Runnable (App in our case) in Datatailr from scratch. It is recommended to go through Datatailr Basics to learn about Runnables, Packages and Images before you start:
- Create a Runnable – write code that you want to deploy, or add an entrypoint to your existing code
- Package your Runnable
- Build an Image with that Package
- Deploy Runnable using that Image
Step-by-step Guide
Step 1 – Creating the Runnable
Writing the App
Let's use this simple Flask Hello World app as a training example of creating and deploying apps in Datatailr:
from flask import Flask
import sys

application = Flask(__name__)
application.debug = True

@application.route('/', methods=['GET'])
def hello():
     return 'Hello World'

if __name__ == '__main__':
     application.run('0.0.0.0', port=int(sys.argv[1]),  debug=True)
In the above snippet, lines 1-9 are the logic of your app which would be there regardless of Datatailr. In our case it simply returns 'Hello World' string when hello() is called.
Lines 11-12 allow you to run your app anywhere, including locally, via calling it with a port as follows:
python app.py 12345
Including the Entrypoint
To make your app runnable on Datatailr, we have to include 2 more lines – __app_main__ entrypoint. Entrypoint is a function with a specific signature that will be executed by Datatailr once the app is deployed. The presence of an entrypoint in a script allows Datatailr to identify that it contains a runnable.
Signature of the app entrypoint –
def __app_main__():
    return application
Note – An entrypoint signature differs for Apps, Batch Jobs, Excel Add-ins, Jupyter Notebooks, Services and Tests, as described in How to Create Programs in Datatailr.
Testing and Pushing to Git Repo
- Launch your
 Datatailr IDE and check out a git repository to which you will push your app.
 - Create a new directory – for example,
hello_world/. In that directory create a new script –app.pyand copy-paste the Hello World app from below. Don't forget the entrypoint!
from flask import Flask
import sys

application = Flask(__name__)
application.debug = True

@application.route('/', methods=['GET'])
def hello():
     return 'Hello World'

def __app_main__( ):
    return application

if __name__ == '__main__':
application.run('0.0.0.0', port=int(sys.argv[1]), debug=True)-
Launch a terminal in the IDE, navigate to
hello_world/and typepython app.py 12345, where12345is the port on which this app will be listening.
-
The app will then launch and run in your Datatailr IDE. A new window with running app should open automatically – look at it to verify that the app is operating as expected. You can also access the app manually at https://{sandbox_name}.datatailr.com/dev/dev-app/12345/. It should display the following –

-
-
Once you’re satisfied with your app code, check it into your git repository and execute a git push.
Step 2 – Building the Package
Now a directory with the app has to be built into a Package so it can be included into Images. This can be done with the Package builder extension. It's installed in the IDE app by default.
-
Right click the
hello_worldfolder in the VS Code's explorer and choose "Datatailr Package Builder"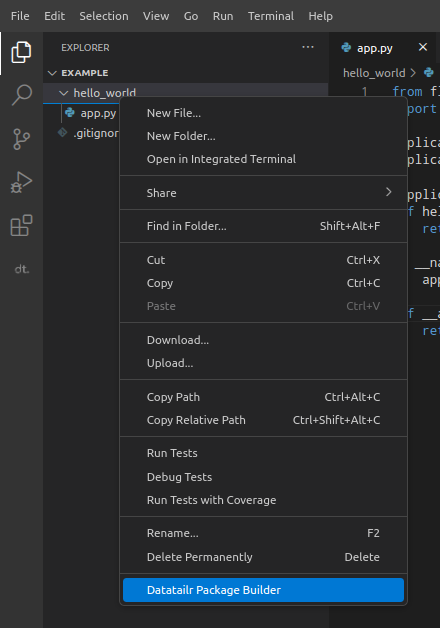
Note – If you build a new package for the first time, make sure the Latest version field at the top says
0.0.0. Otherwise you will build a new version of another package with the same name.
Change the package name and the Package Builder tab will update automatically.
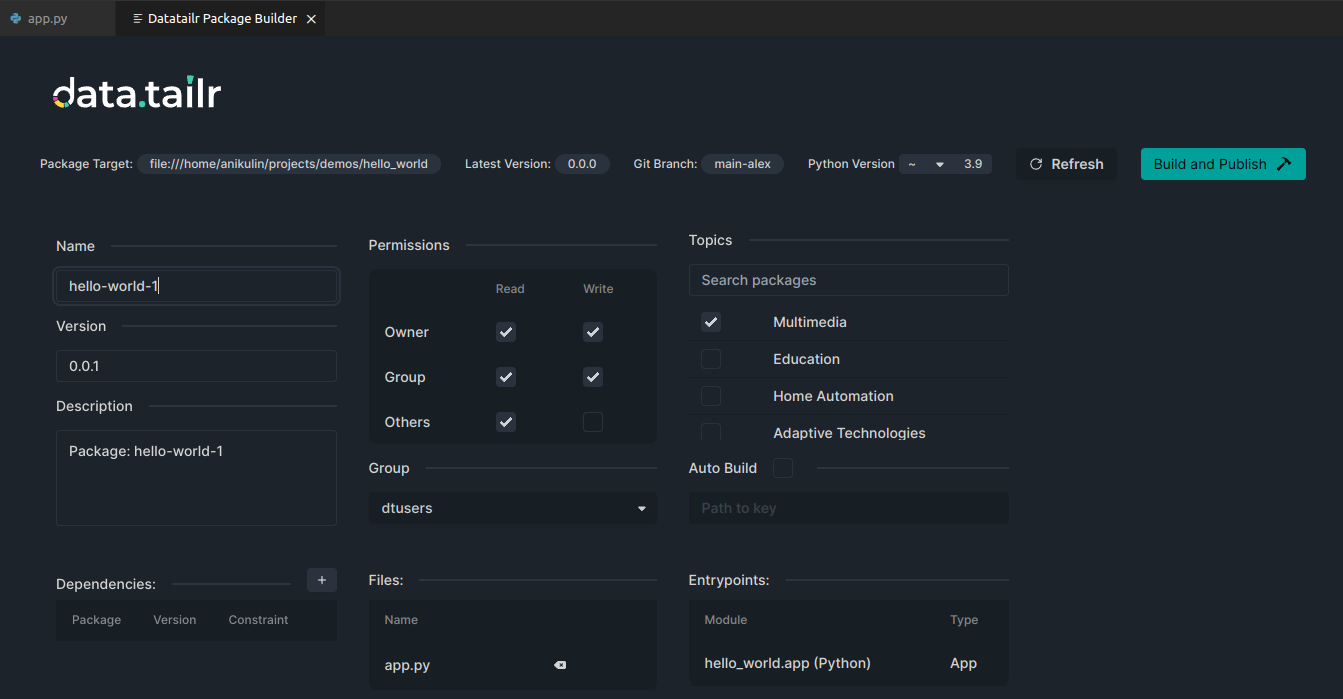
- In the Version field on the left, you can specify the version of a package. This field only accepts semantic versioning (SemVer) format. For example, 1.2.3. Each subsequent time that you build a package, this field will automatically increment.
- The Files list in the bottom, allows you to exclude the files that you don't want to be in your package. By default, all the files are present here, and therefore, you only need to click on
 next to the files to be excluded.
 - The Entrypoints list in the bottom right allows you to verify that your
__app_main__entrypoint was correctly detected in the package - The Permissions area in the center lets you define the user group which will own this package (app) and view/modify permissions for users
Note – Package Builder performs automatic scanning of imports in your package so that the required dependencies are detected and listed in the table on the bottom left.
If, however, your package performs imports via importlib library or uses other types of dynamic dependencies, then click the + button to manually specify these dependencies, because they cannot be detected automatically
-
In this case, the defaults are already enough to build a package. Click Build and Publish.
-
After publishing, the package will appear in the Package Manager
 app. It's not necessary, but in the Package Manager you can right-click on the row of your package and select Enable Auto Build, as shown below –
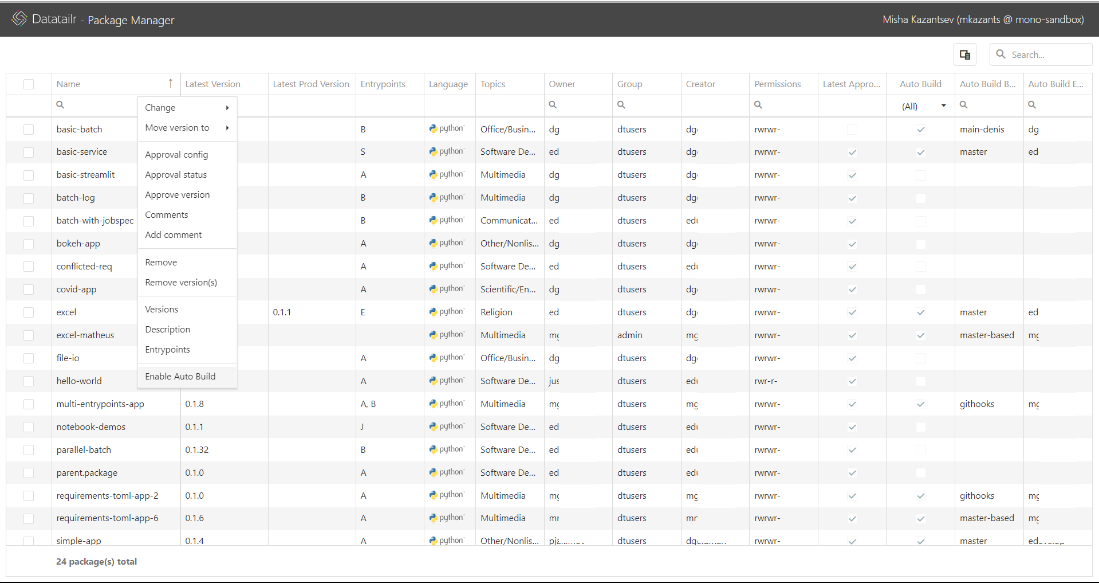
Note – enabling Auto Build specifies that this package is automatically re-built whenever any changes are made to it in the git repository.
Every time package is rebuilt, a notification is sent (as described below) and the badge number in the top right corner increments. Click on your name to display a dropdown menu and select Notifications to display all your notifications –
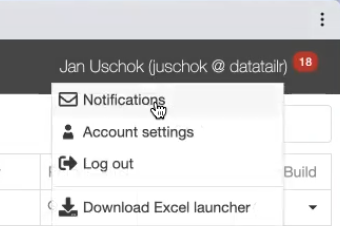
Step 3 – Building the Image
To deploy the package you just built, you first need to incorporate it into a containerimage – any runnable in Datatailr is executed in a Docker container to achieve isolation and reproducibility.
Follow these steps to incorporate the package into a container image –
-
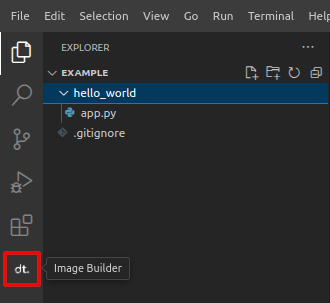
To open Image Builder extension, click on this icon in IDE:
Then Click to Start Image Builder:
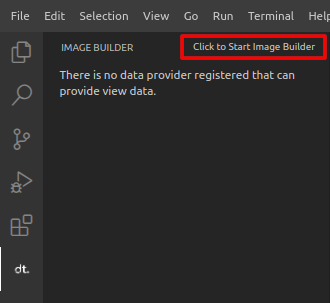
The Image Builder tab will open.
-
If you want to add this package to the image that already exists (for example, the one that is currently running in the Datatailr IDE), you can select the Existing Image option.
For this tutorial let's build a new image with the package by selecting the New Image option, as shown below –
-
From there, choose the name, description, Python version and the group for the Image. You can use these settings:
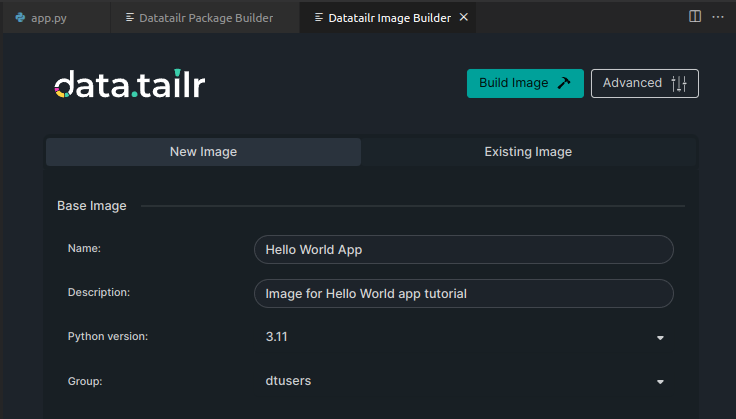
Once you fill everything, Build Image button will be enabled, but we need to add our package first.
-
Below the image settings, find your package among Internal Python Packages and select it.
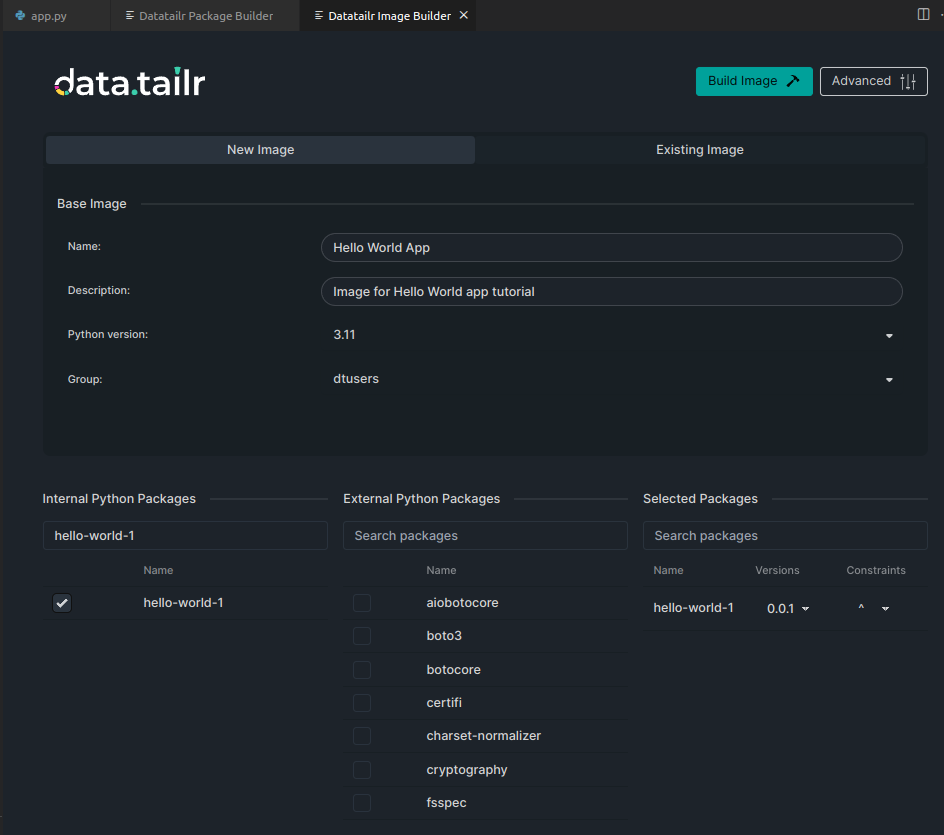
Note – You don't have to add package dependencies here, if you already specified them during package build.
-
Now you can click Build Image. The build will take a few minutes.
-
Once your new image is built, you will see it listed in the Image Manager
-
It’s not necessary, but you can attach an IDE to the image you built to verify that your app works. To do so, open Image Manager from the landing page, right-click on the image and select Launch IDE –
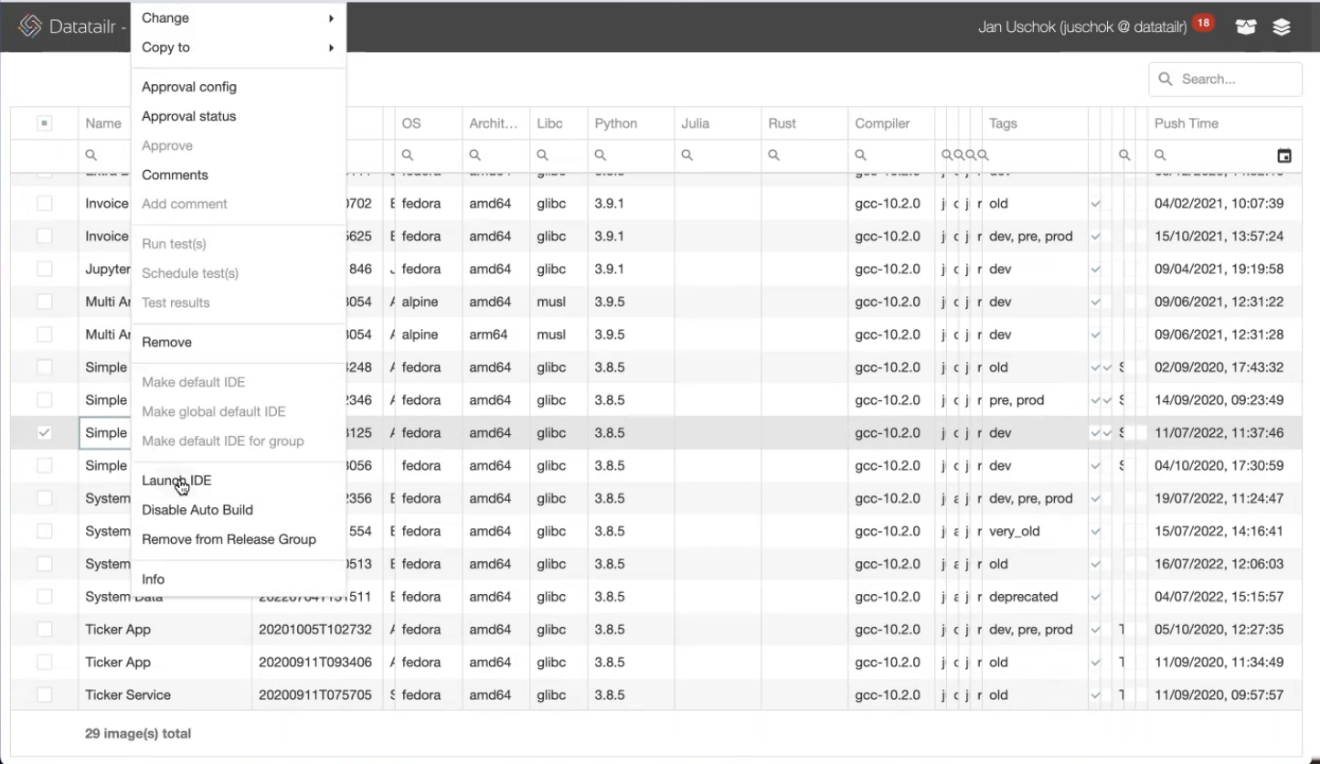
This will start a second IDE with selected image so that you can verify that the package you baked into this container actually functions in the same runtime environment where it will execute once deployed. Once IDE loads, do
from package_name.file_name import __app_main__and call the entrypoint. -
You can also right-click on your image and select Enable Auto Build to specify that this image has to be automatically re-built each time one of the included packages is re-built. You will receive notifications from Autobuilder when image build starts and finishes, just like with packages. If any Runnable is deployed with that image in the Datatailr dev environment, it will be automatically restarted with the new version of an image.
Note – Once you set up Autobuild on Package(s) and Image that your Runnable uses, all you have to do to update your Runnable is push the changes and wait for the notifications about successful builds to appear.
Step 4 – Deploying the Runnable
Job Scheduler  enables you to schedule, monitor and control any Runnable that have been created in Datatailr.
-
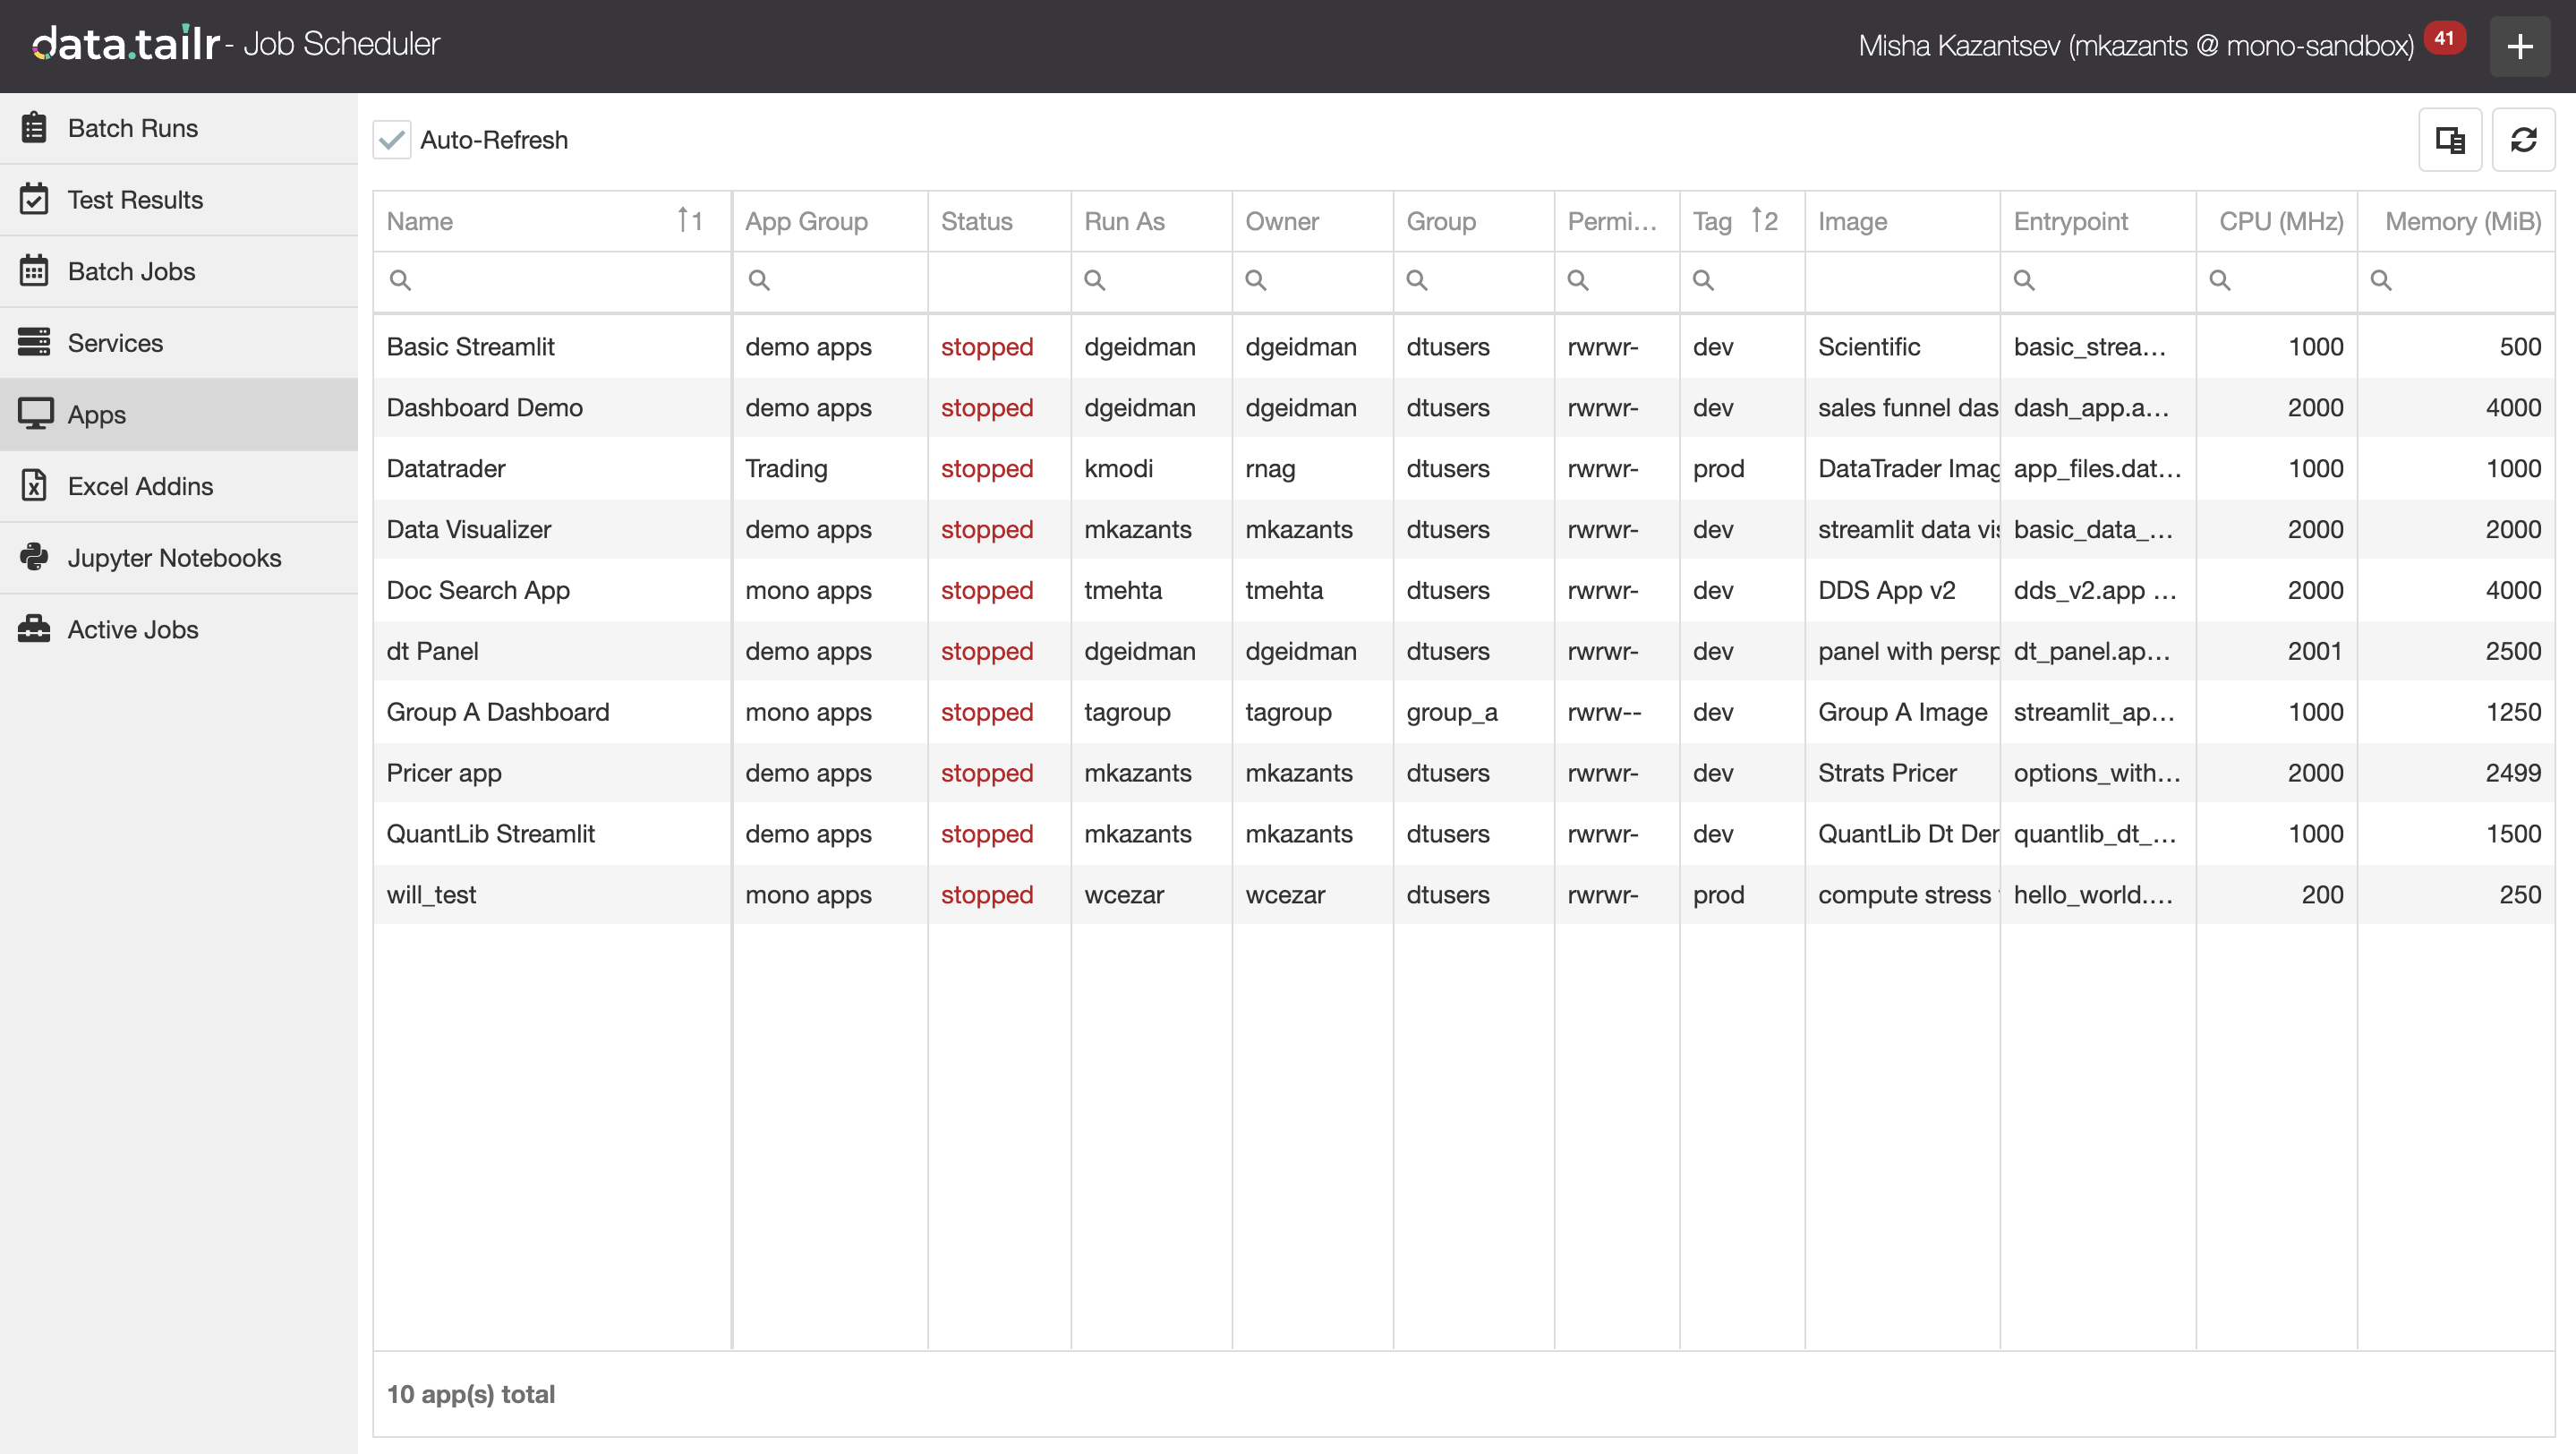
From the landing page, open the Job Scheduler and select Apps section in the left pane, as shown below –
-
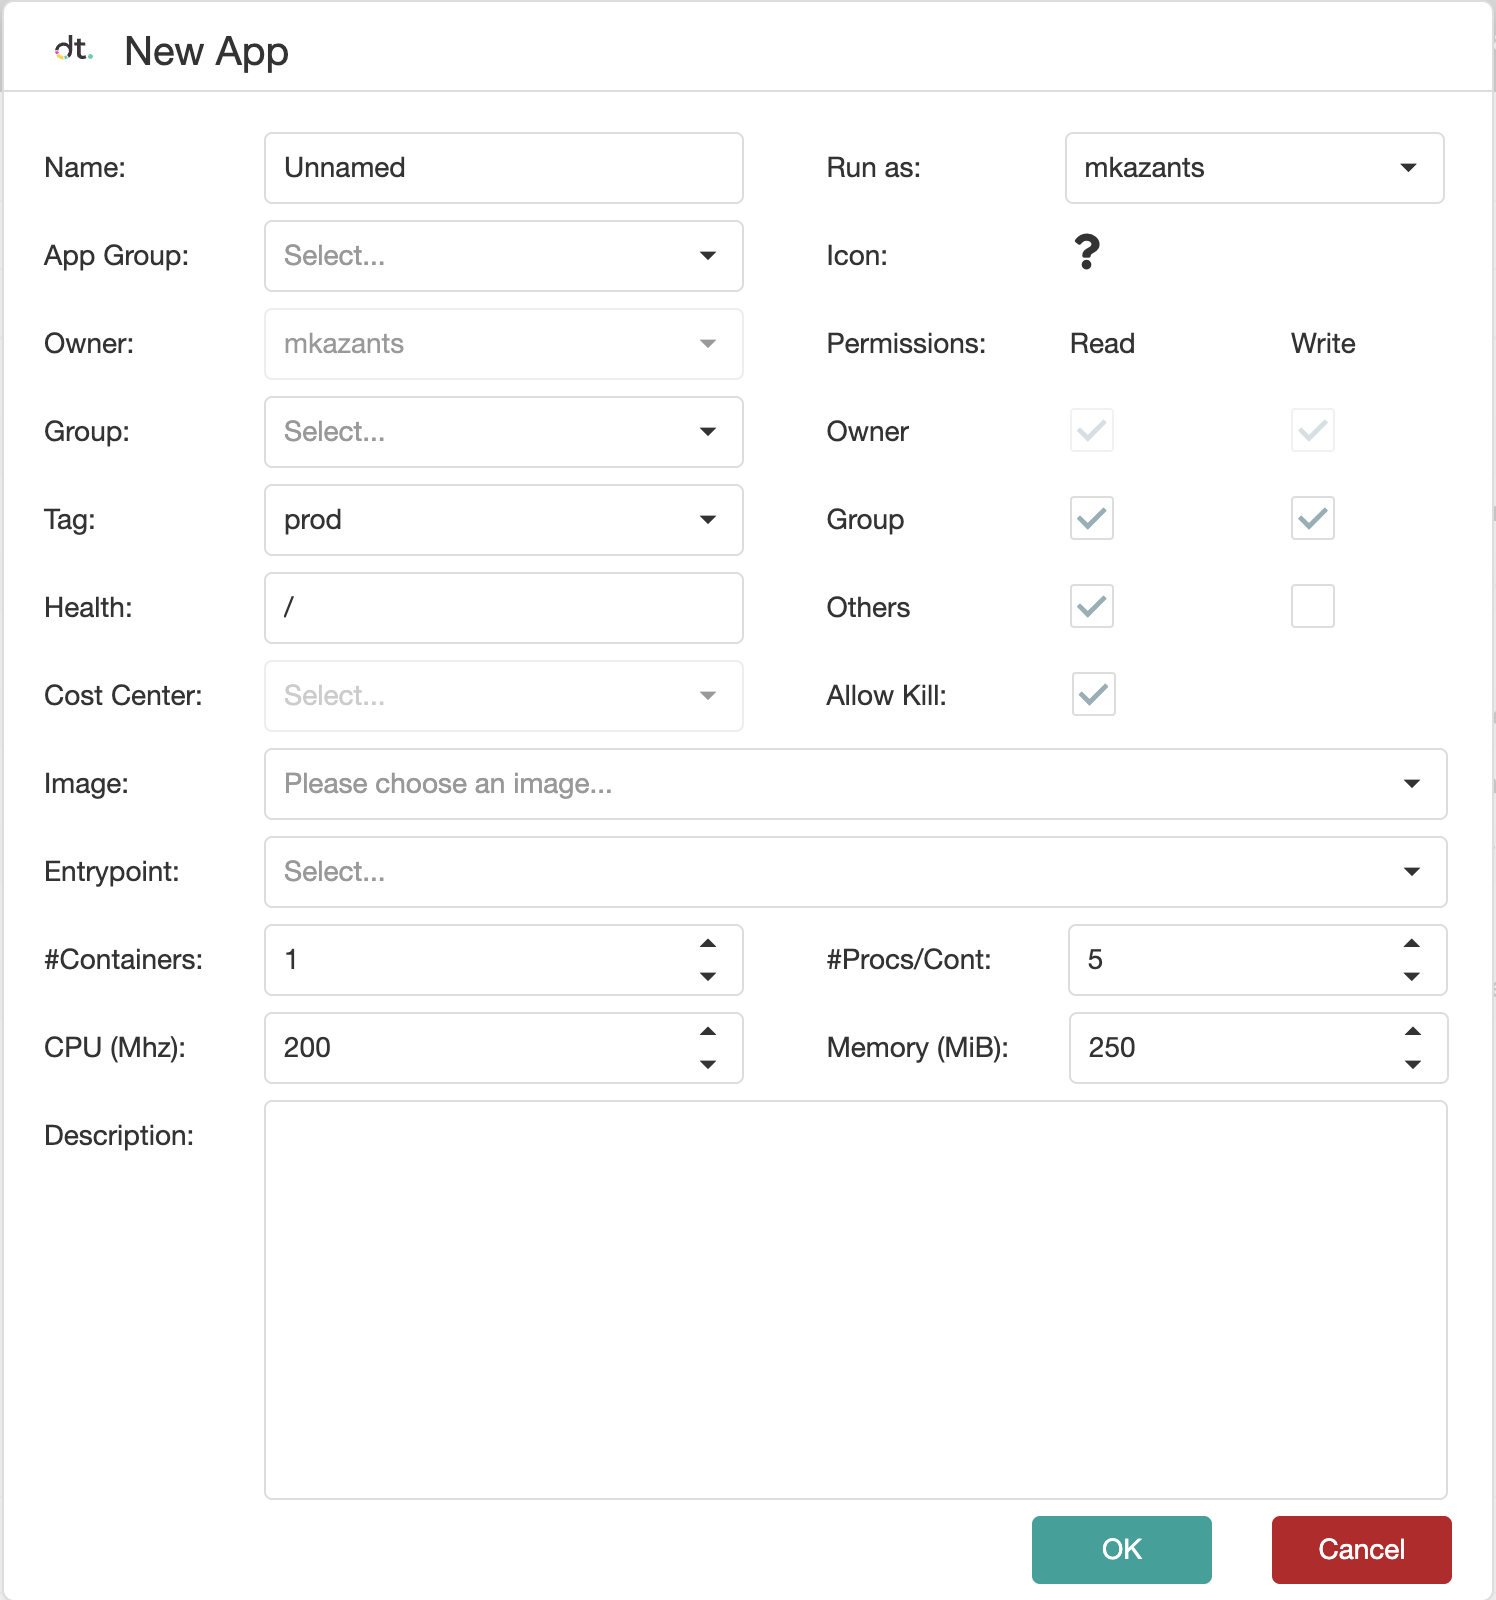
Click the + button in the top right corner to deploy a new app. The app configuration pop-up is displayed –
-
Fill out the fields of this window:
-
Name – Assign an indicative name to appear in the Datatailr main window under the icon of this runnable.
-
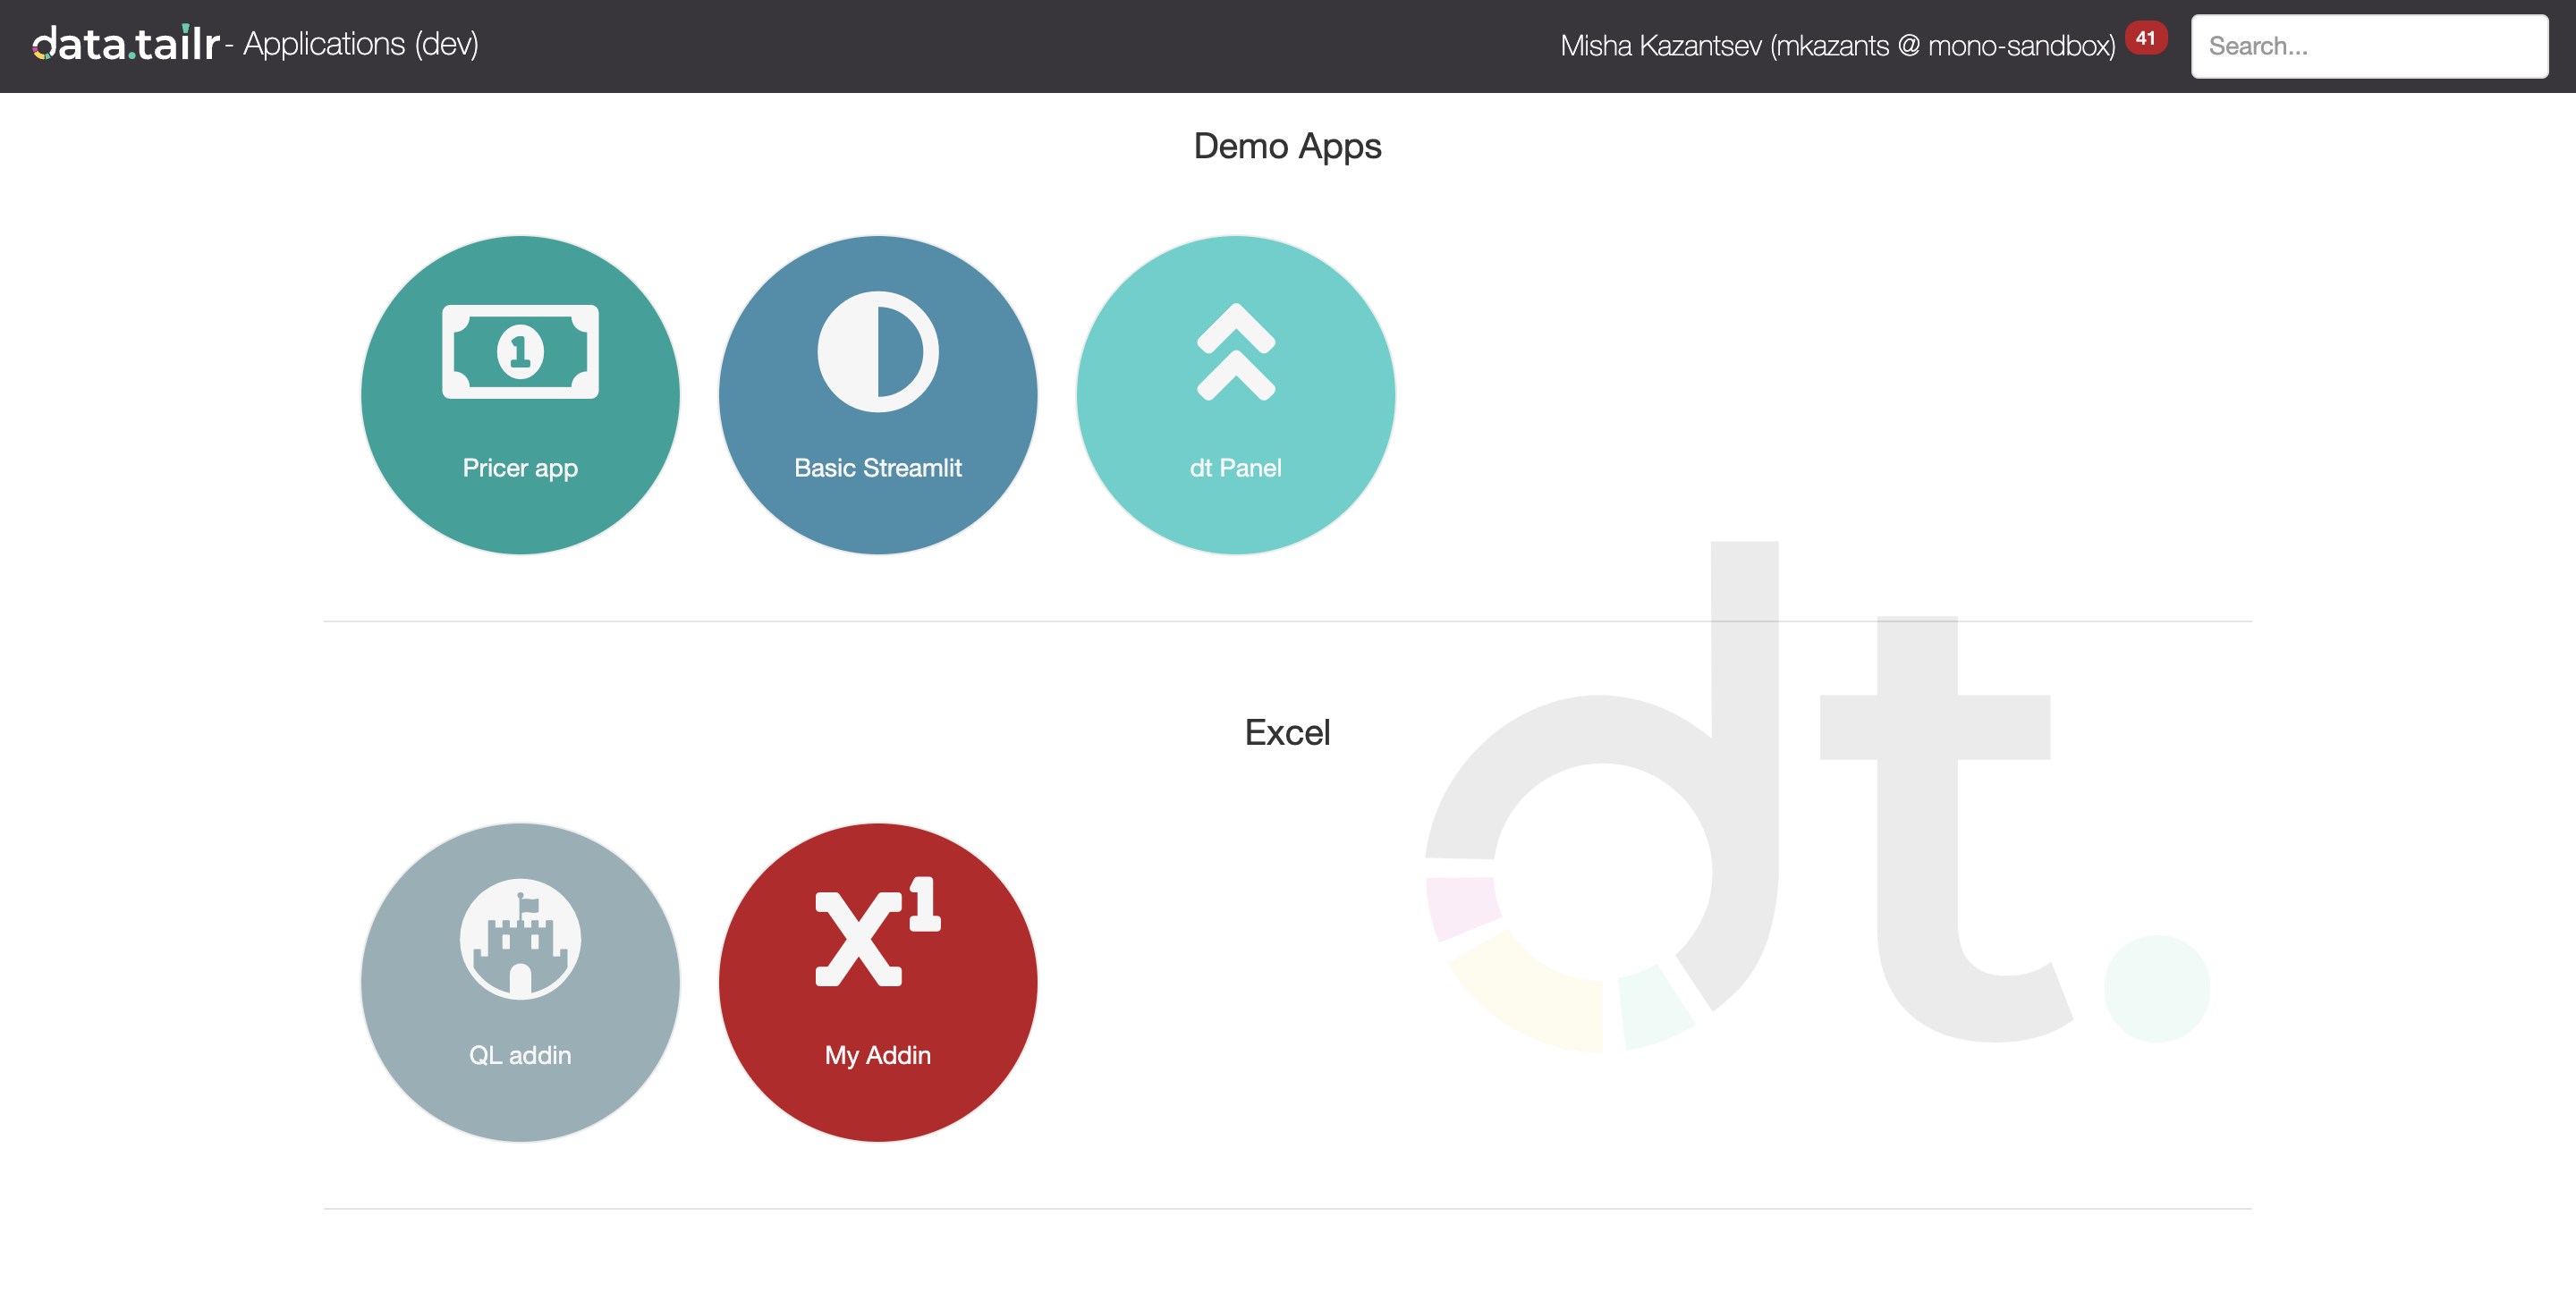
App Group – Select an existing App group from the dropdown menu or enter a new name to automatically create that group. For example, the following shows two app groups: "Demo Apps" and "Excel" –
-
Group – Select a user group to specify that this app appears in their Datatailr main window.
-
Tag – selects a Datatailr Environment, images from which will be available in the "Image" field. Select dev, because all images in Datatailr are built in the Dev environment.
Note – In the Image Manager images can be manually copied, or "promoted" into the next environment (first to Pre-Production, and eventually to Production).
-
Image – Shows all images in selected Datatailr environment that have the corresponding type of entrypoint. For example, when creating new app, you will see all images that contain packages with the __app_main__ entrypoint. Select the image with Hello World app that we built in Step 3.
-
Entrypoint – Selects an entrypoint in the given image that this Runnable should execute. Like in the "Image" field, you will only see entrypoints of the corresponding type – if you are scheduling an app, only __app_main__ entrypoints will be displayed. The format is
package_name.file_name– in our example,hello_world.app (Python)is a module that corresponds to the directoryhello_world/app.py, from which we built the package that we included into an image, and which contains the __app_main__ –def __app_main__(): return application -
#Containers – Number of identical containers of specified configuration with the Runnable that will run behind a load balancer. Containers will be hit in a round-robin way. This is useful when your app is getting popular and being accessed by many users.
-
CPU – CPU resources in MHz that will be available to the container with the Runnable.
-
Memory – Memory in MiB that will be available to the container with the Runnable.
-
Description – Enter a text description of this new runnable.
-
Icon – Select an icon that your runnable will have on the Datatailr landing page.
-
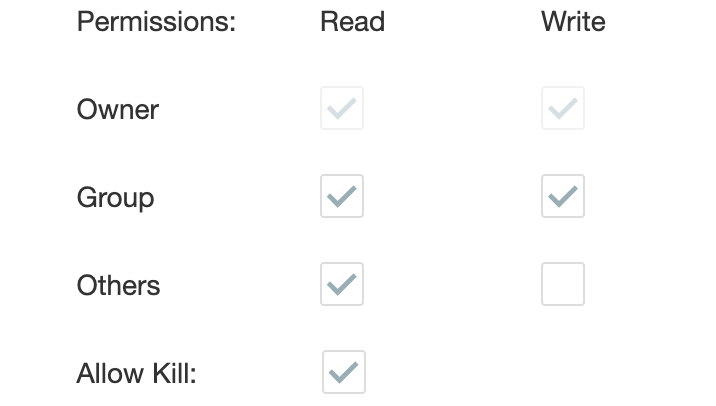
Permissions – Define the access (view and modify) permissions of the users who can access this runnable. See Permissions in Datatailr to learn more about what each permission implies.
-
Allow Kill – Specifies that Datatailr can automatically relocate this runnable to a different VM in order to reduce costs.
-
Leave other fields at their default values and click OK.
-
-
The App is now scheduled to run – its status will change to "running" as soon as it starts.
Step 5 – Accessing and Monitoring the Runnable
Accessing the Runnable
The Dev and Pre runnables can be accessed from the Dev Apps / Pre Apps, shown below –
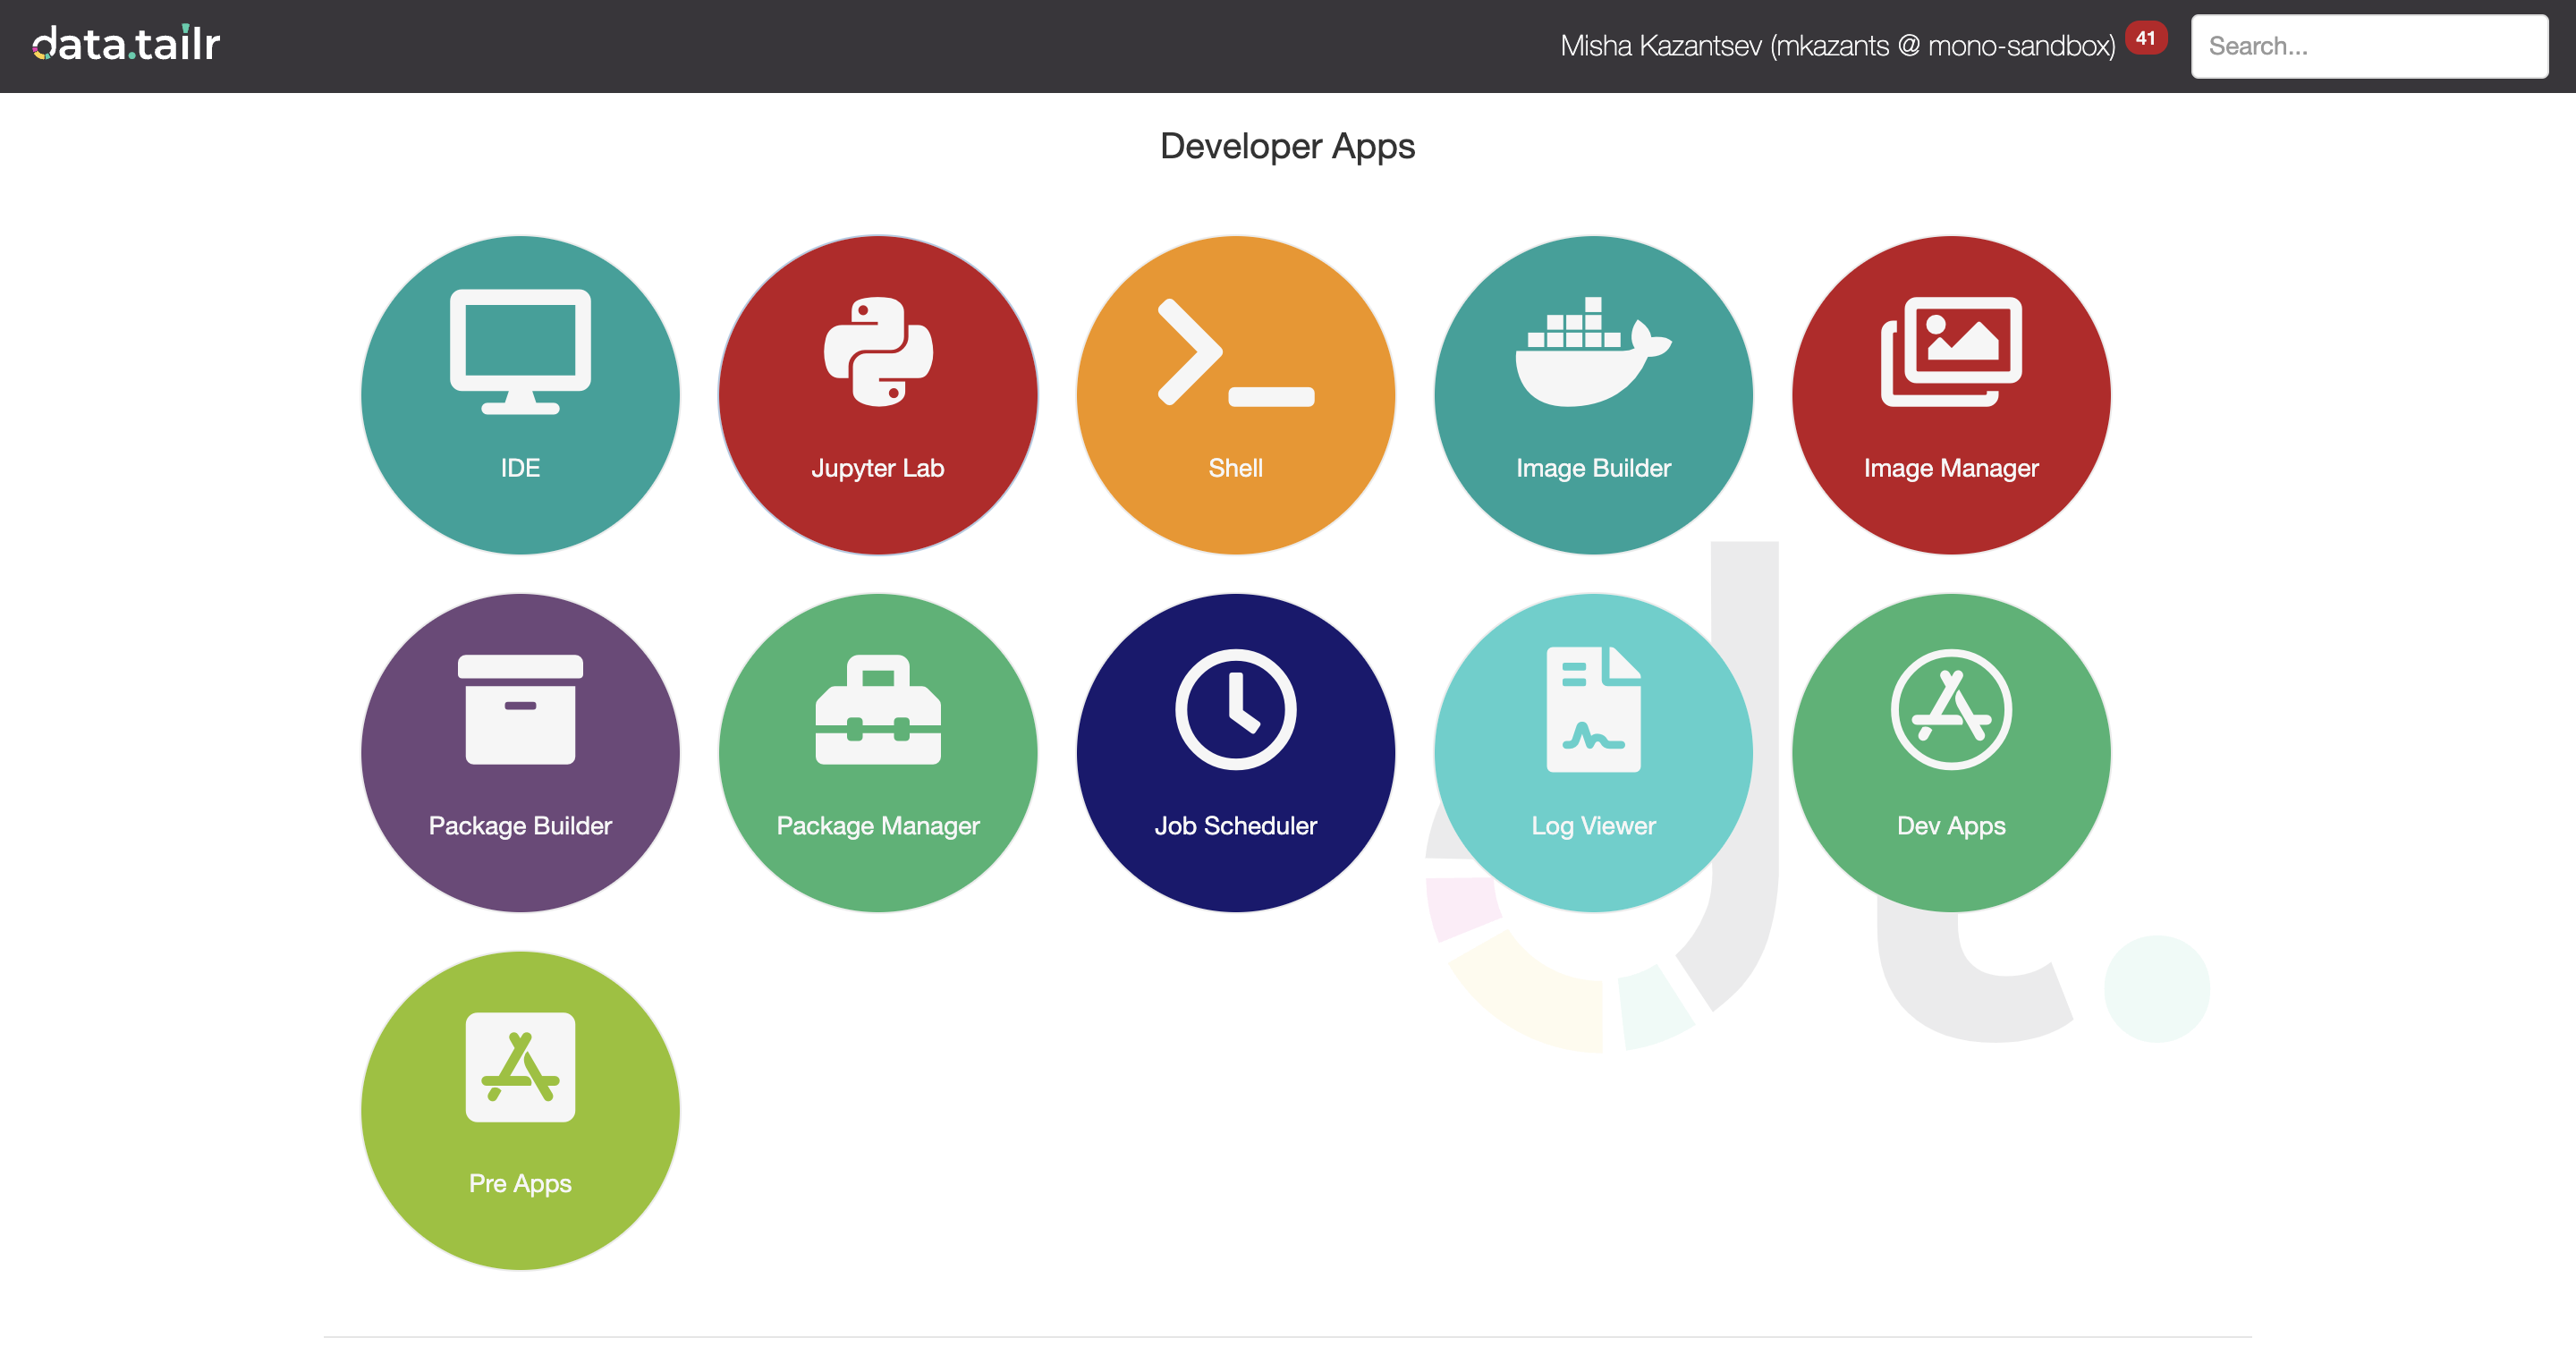
Click on the Dev Apps icon to find your Hello World App. A window will be displayed – it is similar to what end-user will see when this app is assigned with the prod tag . You should see your app there – click on its icon to run it.

Monitoring the Runnable
Once the Runnable is deployed, you can navigate to the Active Jobs tab in the Job Scheduler to see that your Hello World app is running –
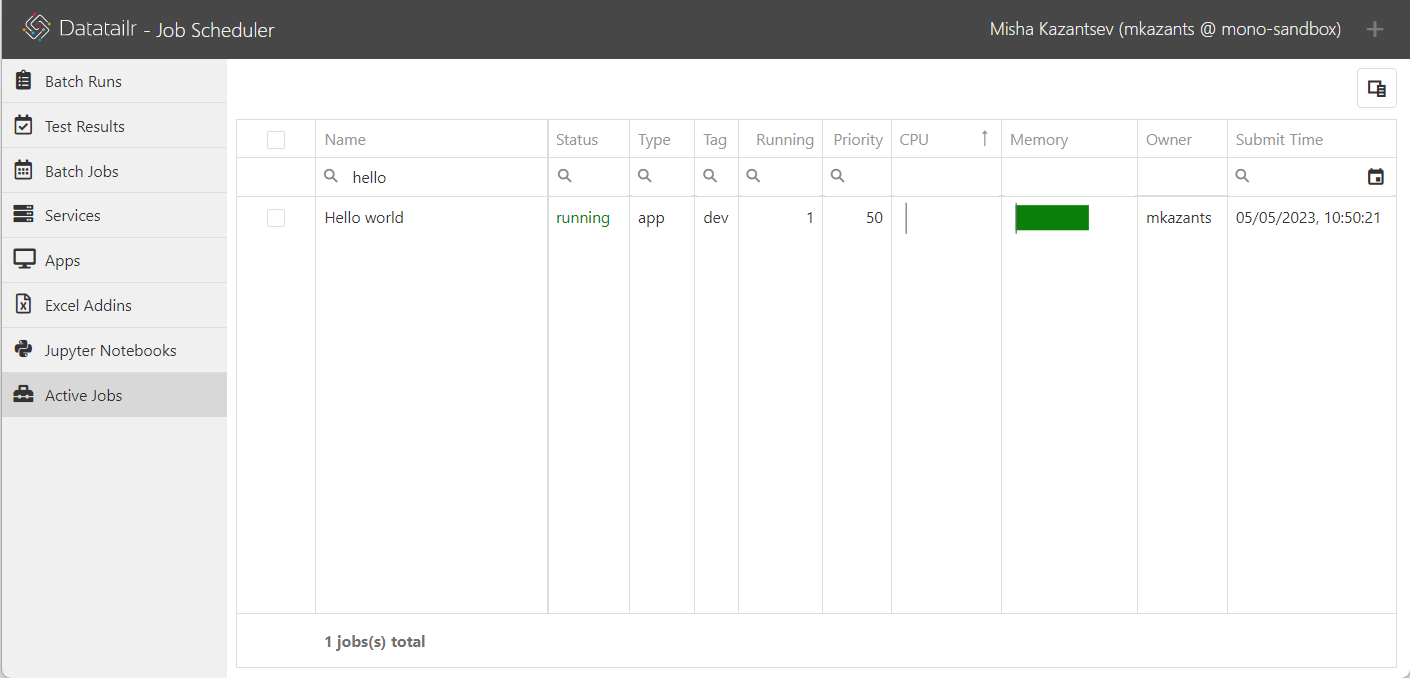
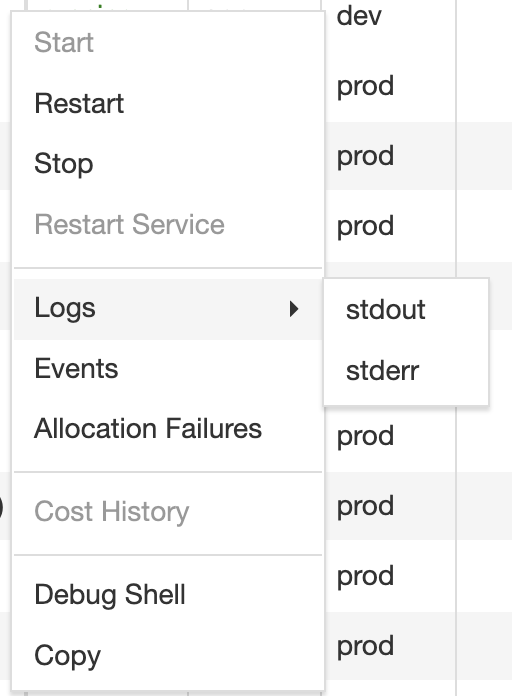
You can right click on it to get to its context menu which provides access to Stdout, Stderr and Docker Events of the Runnable, as well as Stop and Restart options –
Congratulations on creating and deploying your first Runnable in the Datatailr environment!
Next steps
Now you are probably ready to start developing more sophisticated runnables.
-
You can find various Datatailr runnable demos in the datatailr-demos repository.
-
We recommend reading How To Create Programs in Datatailr for more details about developing Apps, Excel Addins, Services, Batch Jobs and Jupyter Notebooks.
-
You can read about all the details of every app (tool) that Datatailr provides for developers – see Developer Apps.
Updated 2 months ago
