Package Builder
The Package Builder app is used to organize and deploy your code as installable packages with modules and submodules.
Note – The Package Builder app will be deprecated soon. Instead, it is recommended to use Package Builder VSCode extension in Datatailr IDE. To activate the extension, right-click on any directory in the file manager in your IDE and choose "Datatailr Package Builder" from the context menu. The instructions on this page, apart from "Adding a Git Repo" section, are also relevant for the extension.
Adding a Git Repo
To build a package we must first clone the source code. This can be done by clicking on the Git Config icon  in the top right corner and adding a git configuration – a way to connect to the code repository so that updates can be fetched and explored.
The configuration includes the following fields:
- Name – used to identify the repository in the package builder
- URL – the url of the remote repository. This can be obtained from the 'clone' flow of your git hosting service. An example url:
github.com:Datatailr/datatailr-demo.git - Login – the type of VCS you are using. We currently only support git, so the value of this field should be 'git'
- Private SSH key – the private part of an ssh key that can be used to access the repo.
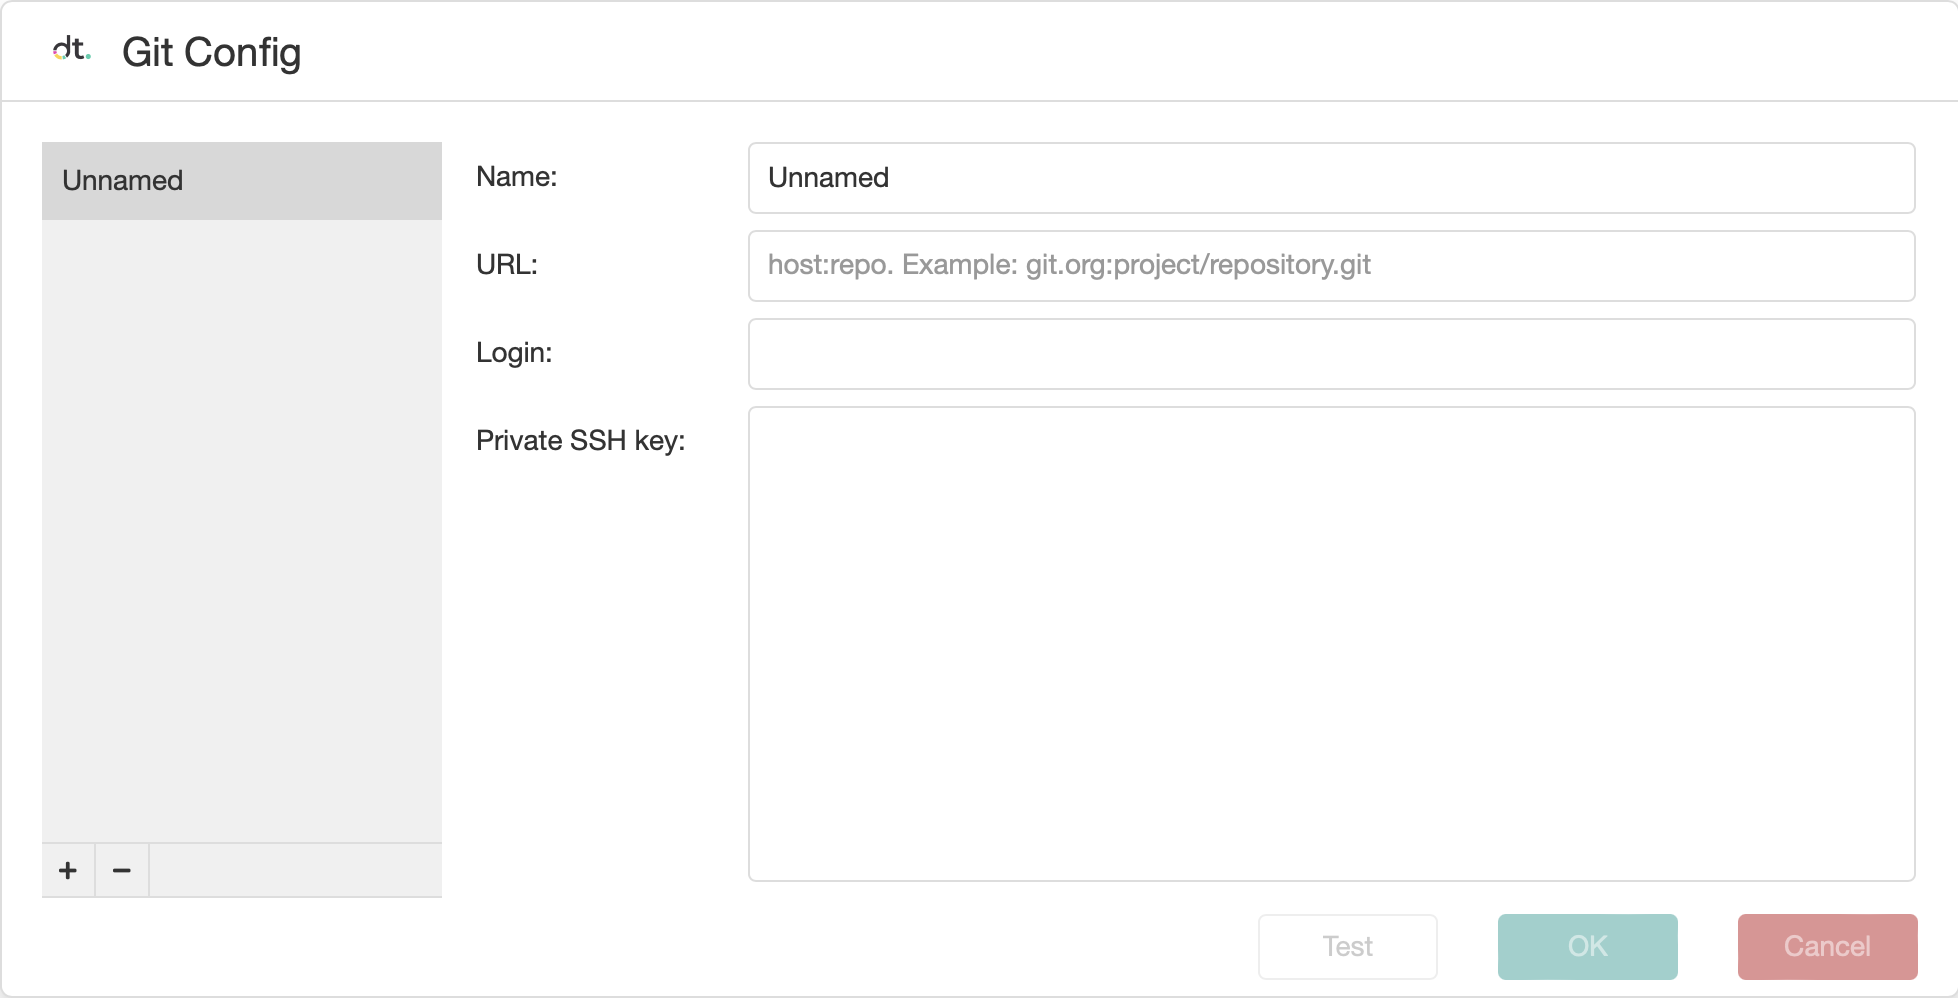
Additional repositories can be added by clicking the + sign in the bottom left corner.
Building a Package
After the code repository was added, you can browse its contents. Multiple packages can be built from the code in a single repository. A typical structure of a file tree in a repository is:
├── package_a
│   ├── __init__.py
│   ├── module
│   │   ├── __init__.py
│   │   ├── file_1.py
│   │   └── file_2.py
│   ├── requirements.txt
│   └── utils
│       ├── __init__.py
│       ├── file_1.py
│       └── file_2.py
└── package_b
    ├── __init__.py
    ├── module
    │   ├── __init__.py
    │   ├── file_1.py
    │   └── file_2.py
    ├── requirements.txt
    └── utils
        ├── __init__.py
        ├── file_1.py
        └── file_2.py
It is possible to have multiple packages to exist in the same repository. In this example we'll show how to build the dt_batch package from our demo repository.
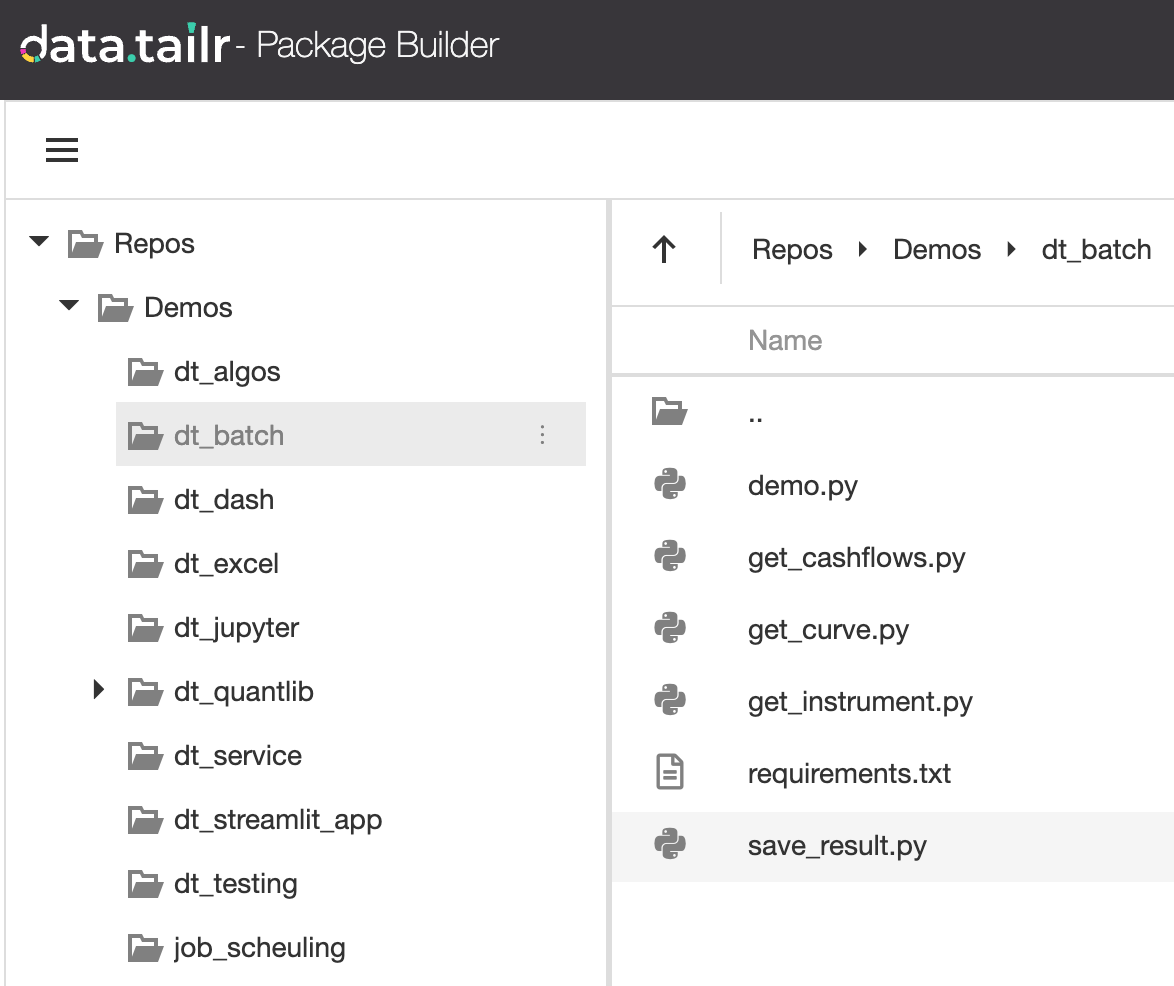
The steps to create the package are:
-
Right click on the
dt_batchdirectory and select 'Create Package' -
Select the Python Version for which you want to build the package:

-
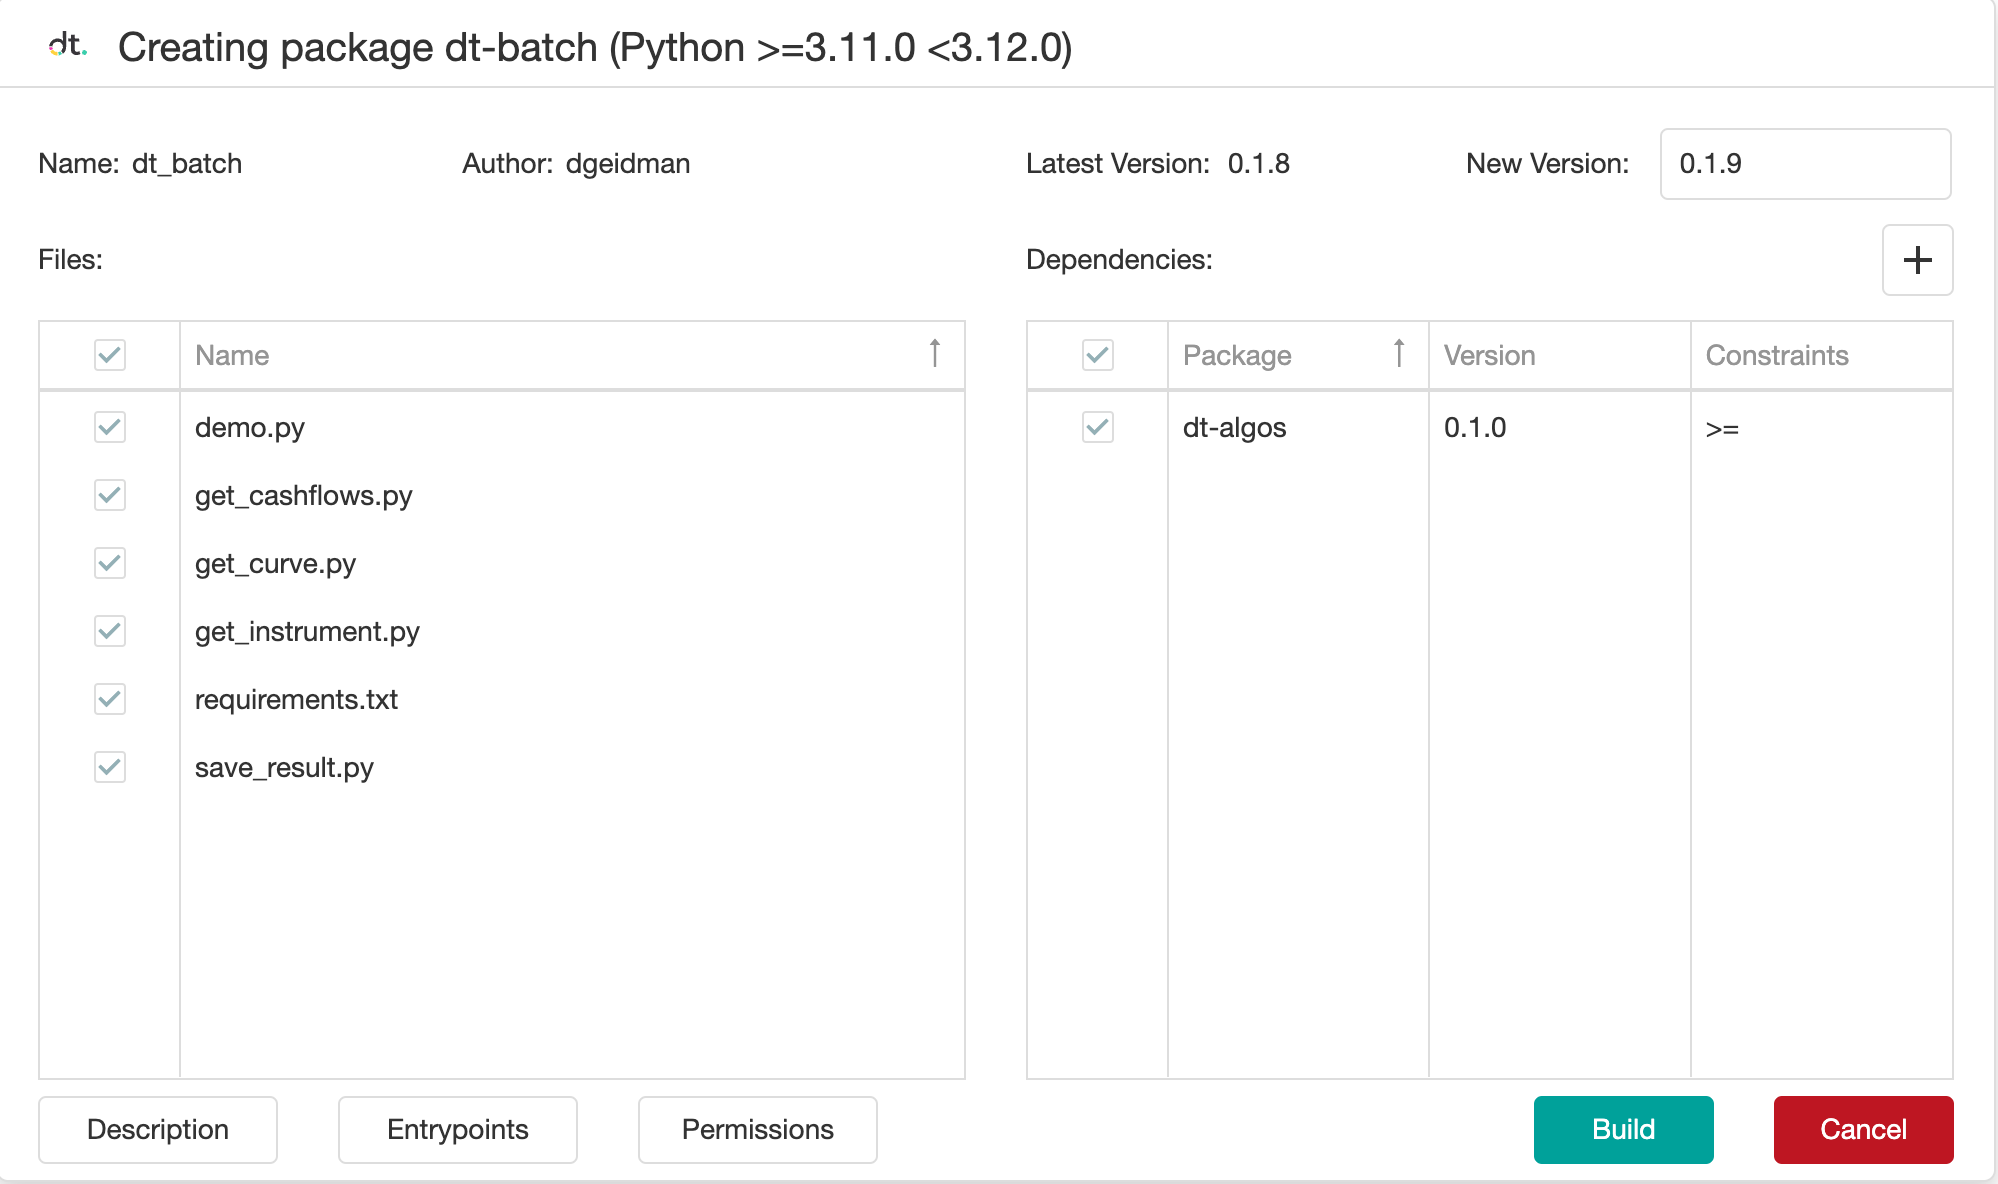
Now you can see the files which will be included in the package, as well as the dependencies on other packages. Please read the Dependencies section for more information on how to set and manage them.
-
If you are building a new version of an existing package, then the next-after-the-latest version will be displayed. Otherwise, the version will be set to
0.1.0for new packages. You can set the version to a different value and consequent builds will continue incrementing it. -
There is some information that should be filled before the build can start:
- Description and Topic
- Permissions - this will determine which users can read/write the package. By default, the
dtusersgroup, which includes all Datatailr users, will have read and write access
-
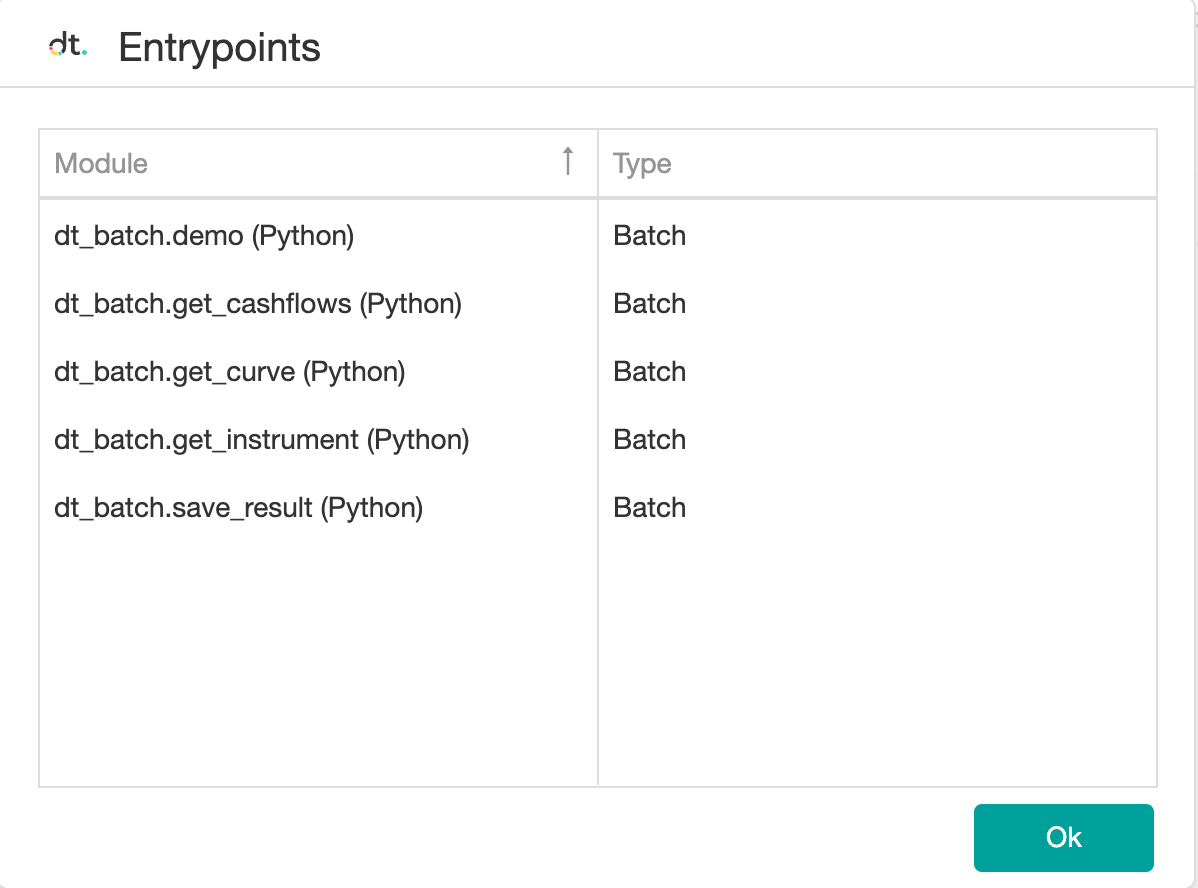
At this point you can observe the entrypoints which the package will contain, and verify that all of them were identified and included correctly. These entrypoints can later be used for scheduling batch jobs and running services and applications.
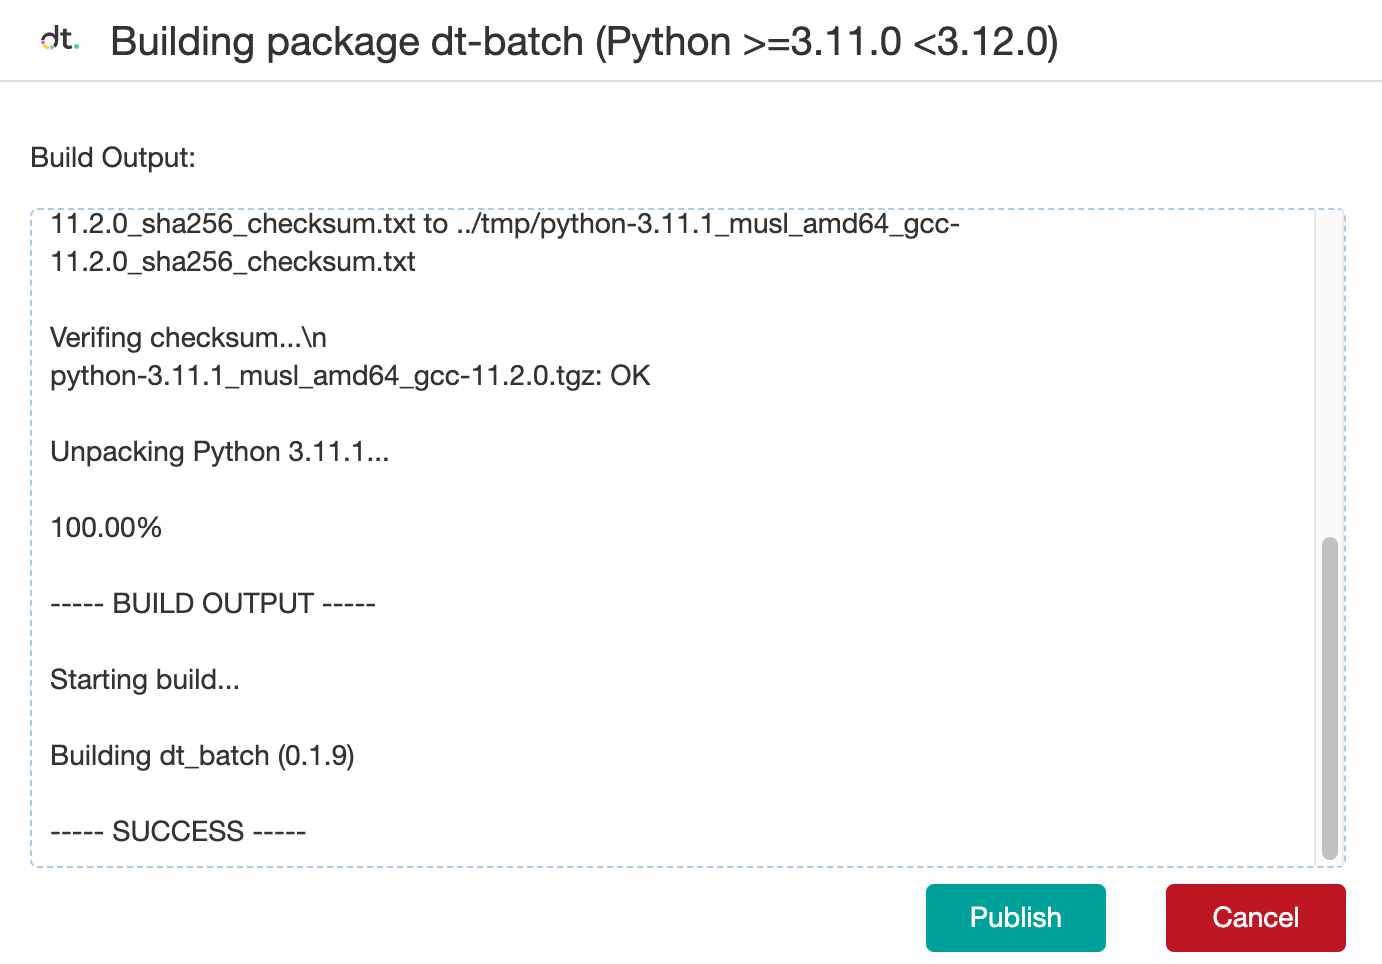
Now you can start the build. After a few seconds during which the code is packaged, you will have the option to publish the package – this will make it available for installation by anyone who has reading access to it, based on the permissions you have configured.
Dependencies
A Python package can depend on code which needs to be imported from other packages. Knowing these dependencies at the time of installation of the package will allow pip (Python package installer) to install those dependencies and ensure that the package can be used.
Datatailr currently supports two main ways of defining these dependencies in your code:
Using a requirements.txt file
The Package Builder accepts requirements.txt files in text format, in which each line defines a dependency in the form numpy>=1.24.2. A requirements file can be either 'local', or 'global':
- local
requirements.txtis placed inside your package directory, like in the example above; - global
requirements.txtis placed in the root of the repository. It will be used when creating a package from a directory that does not have a local requirements file.
Using the imports scanner
If a requirements file is missing from both the directory and the repository root, then the Package Builder will scan the import statements in the source code and determine the dependencies based on the imported libraries. The versions will be set to the latest available version of each package.
Note – if your package performs imports via
importliblibrary or uses other types of dynamic dependencies, then click the + button on the package configuration pop-up to manually specify these dependencies, because they cannot be detected automatically.
Setting Package for Autobuild
After you created the first version of your package, you can set the package for autobuild as described in the Autobuilder section to save yourself from having to go through the above process of building a package every time you make a change in your code. If autobuild is enabled for a package, Autobuilder will build its consecutive versions automatically.
Updated 3 months ago
